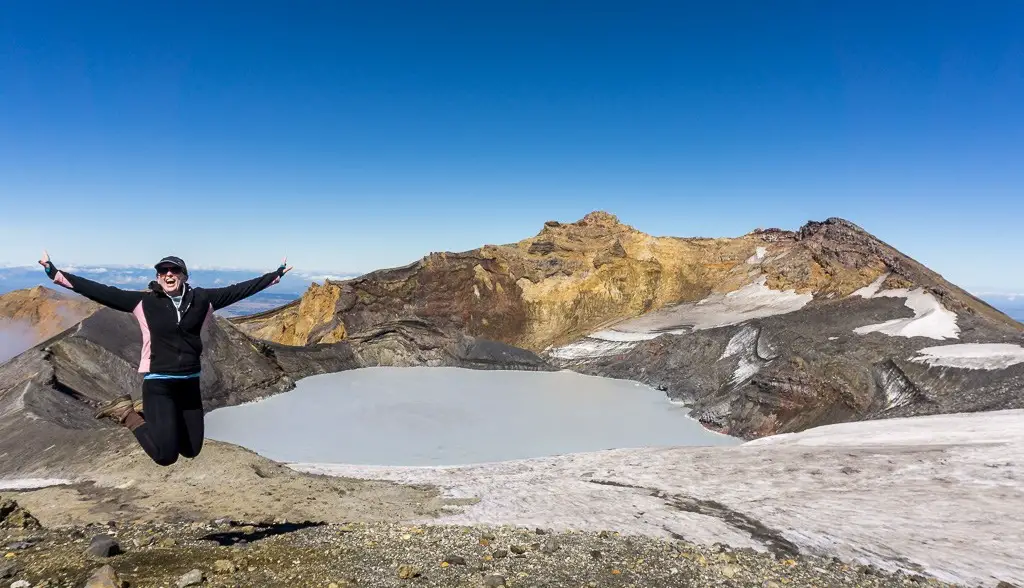
Mt Ruapehu Crater Lake is an epic trip. Not only are you climbing the highest peak in the North Island – you’re also climbing an active volcano. The prize at the top is Crater Lake, a warm sulphuric lake sitting on top of the volcanic vent, and amazing views as far as Mt Taranaki on a good day.
Length: 8-10km return, including a 1000m ascent and descent
Time taken: 8hrs return (chairlifts could cut out about 2-3 hours, if they’re operating)
Difficulty: Difficult, route only
Facilities: The route we took is on the North side of Mt Ruapehu and departs from Whakapapa ski-field base. The base has toilets and a shelter. There is a bar (Schuss Haus) at the top of the first chairlift. Knoll Ridge cafe is at top of the second chairlift (apparently the highest cafe in NZ). But otherwise no shelter or water from then on up.
– Important: This walk is to the the top of an active volcano. Check DOC and Geonet for current alerts before setting out. If you hear the alert siren while on Mt Ruapehu, get out of the valleys. These can be lahar pathways. –
Don’t make me tramp, I’m full of chocolate
I feel like I start many of my blog posts by saying that I’m not fit enough to be attempting this tramp. But for real this time, I was not fit enough to be attempting Mt Ruapehu Crater Lake. Our tramping party consisted of my Dad (who was coming off the back of Gertrude Saddle and the Routeburn the week before). My sister (who’d just been asked if she’d like to teach the gym classes she attends). And me (who had been binge watching Grey’s Anatomy and eating chocolate).
Tramping is most enjoyable when you’re physically prepared. And Mt Ruapehu Crater Lake isn’t an easy tramp (especially if you opt to not take the chairlifts). So please do what I say and not what I do. Train enough to tackle this and you’ll find it much more enjoyable (and safer). I enjoyed the challenge. But it was definitely a physical and mental battle to get my chocolate-laden body up to the crater lake. But it was so, so worth it.

How to get to Mt Raupehu
Mt Ruapehu is in Tongariro National Park, just south of Mt Tongariro and Mt Ngauruhoe. In the winter, three ski fields open for business; Whakapapa, Turoa and Tukino. (Despite all of them being on the slopes of an active volcano whose last eruption I have memories of). Like walking to Lake Alta in the Remarkables, you can take advantage of the infrastructure of these ski fields when climbing up the mountain. Although there are many routes up Mt Ruapehu Crater Lake, the easiest of which is on the northern side. This route starts from Whakakapa ski field.
To get to Whakapapa ski field, drive through Iwakau Village on SH48 and up the slopes of Mt Ruapehu. You’ll reach the ski field carpark at the end of the road. There is a small shelter here with toilets (next to the barrier gate as you come into the upper carpark). Take advantage of these as there aren’t any the rest of the way up/down (unless the ski field cafes are open).
The route to Mt Ruapehu Crater Lake
I tackled Mt Ruapehu Crater Lake with my family over Easter. (I’d like to say this is why I’d been eating so much chocolate prior to the tramp, but that would be implying I binge on chocolate only once a year, which is patently untrue). This is the time of year when there is the least amount of snow (depending on whether there’s been an early autumn storm or not). So it’s the best time to attempt Mt Ruapehu unless you have alpine experience in winter conditions.
Before the holiday, I’d had a good look online for information about tramping up to Crater Lake. But I wasn’t successful at finding very much. Many websites linked to a DOC page which had since been taken down. I found a few websites which were helpful. But I still felt like we were going in a little blind. The route descriptions had been rather succinct.
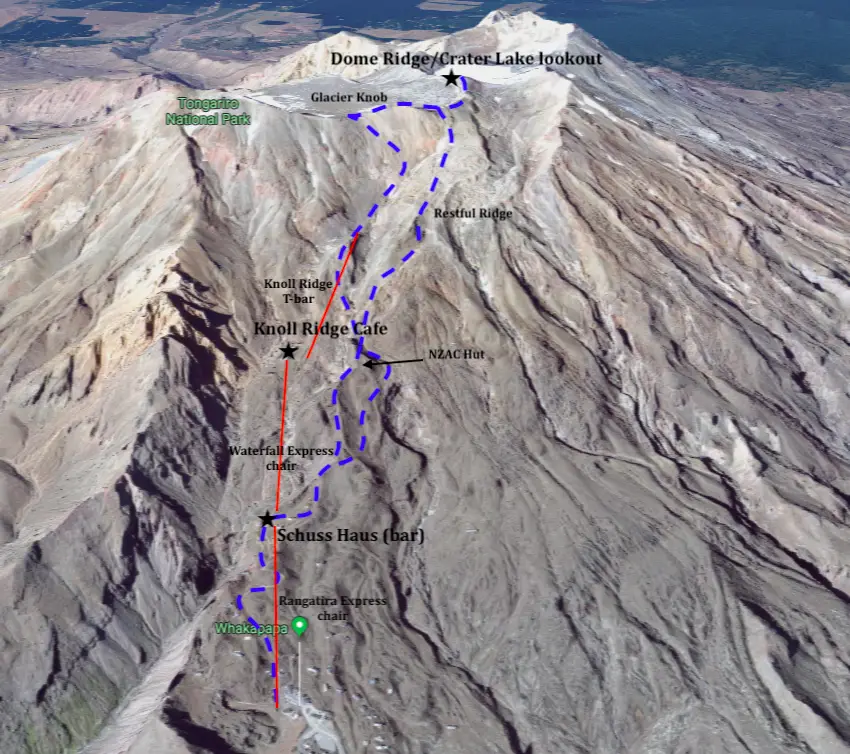
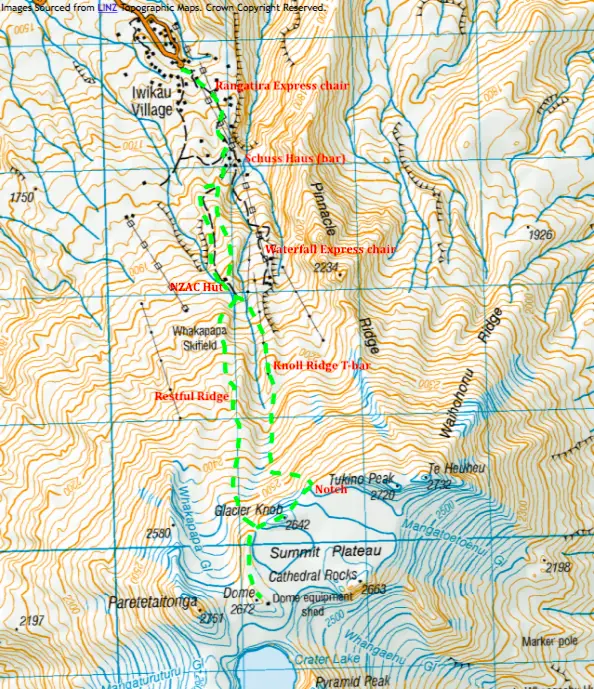
In the end, armed with my research, our route-finding skills, and the NZ Topomaps app + GPS on our phones, we took the Knoll Ridge route up (turning left/East up to the Notch and then up and over Glacier Knob), and came back down the Restful Ridge route. Most sites suggested that Knoll Ridge is best if there is still a decent amount of snow, while Restful Ridge is best when there’s no snow. But there was barely any snow for us, so we ended up doing a round trip.
Chairlifts
In the summer Whakakapa often operates the two bottom chairlifts (for some $$ of course). We already knew that the upper Waterfall chairlift and cafe weren’t open the day of our planned trip. So it wasn’t worth the money and later starting time (first chair is at 9am) to only cut out 30 minutes of walking. However if both chairlifts are running then it ends up cutting out over two hours from your trip. You’d just have to make sure you’re back to the top of the chairlift by 4pm to catch the last chair back down. I think my legs would have forgiven me for putting them through this climb if we’d taken the chairlift. But they certainly didn’t let me forget the fact that we opted not to.
Tramping up to Mt Ruapehu Crater Lake
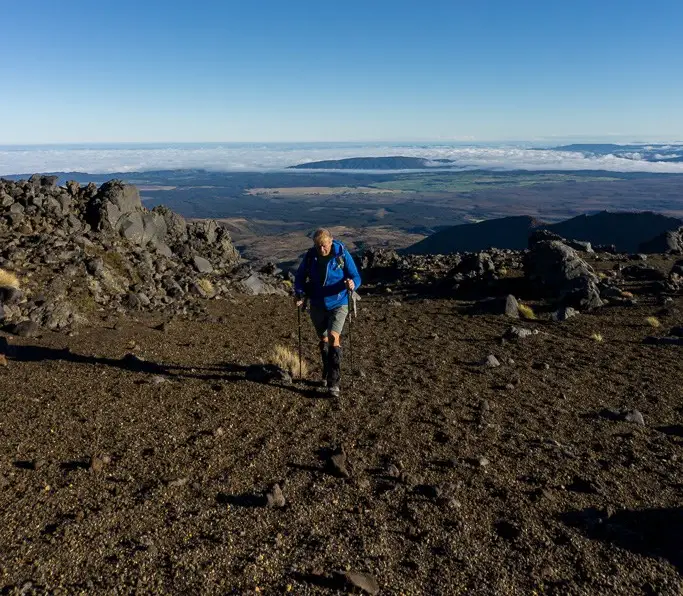
Dad, Heather and I set out about 8am from the carpark. I’ll say one thing for Mt Ruapehu, he really lets you know what you’re in for right from the get go. It’s all uphill from the carpark. We followed a skifield road up between the chairlift and base buildings that curved its way up the hill for about 30 minutes before reaching the top of Rangatira Chair and the bottom of Waterfall Express (where Schuss Haus bar is – my saviour on the way back down).
Here we faced our first decision with regards to the route. I knew there was a relatively well-used track up the bluffs below the Waterfall chair. The skifield advertises it as one of the day walks that you could do after you’d paid to take the chairlift. But we couldn’t see where it went and didn’t want to lose too much time trying to find it this early in the day.
Instead we opted to climb up to the ridge on our right. It looked like it would be easy to navigate and would give us a better vantage point to see where to go next. I’m sure the Waterfall track is another good option. Although we did find an easy track on our way back down that actually had poles (easier to pick up going down than it was on our way up) and is marked on Topomaps. But really you can’t go too wrong as long as you have a map and read the terrain (i.e. don’t try to climb up bluffs).
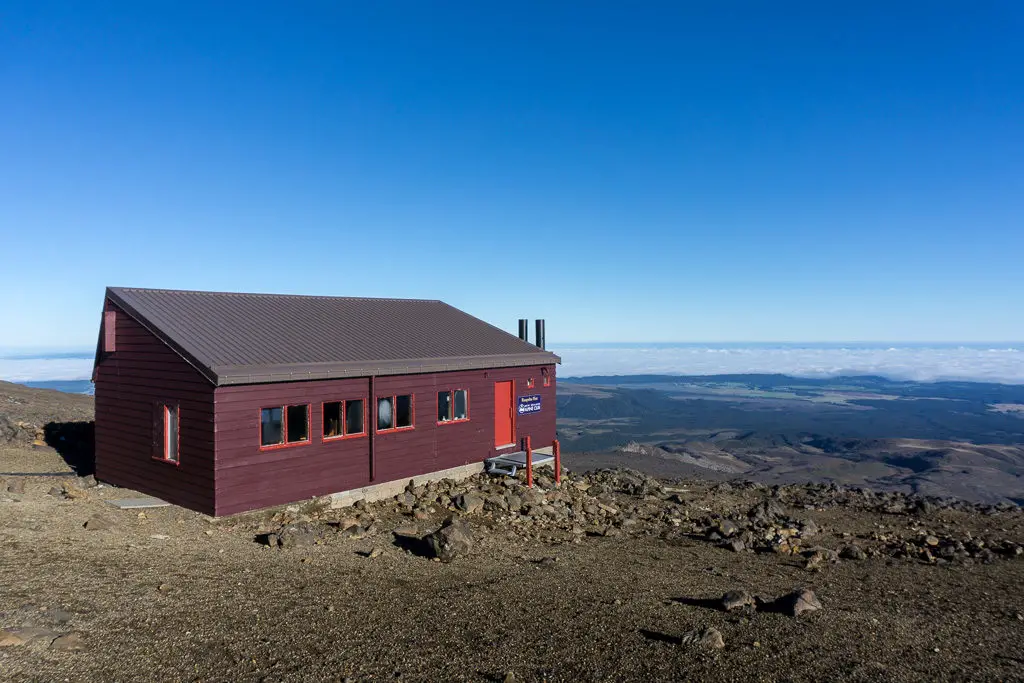
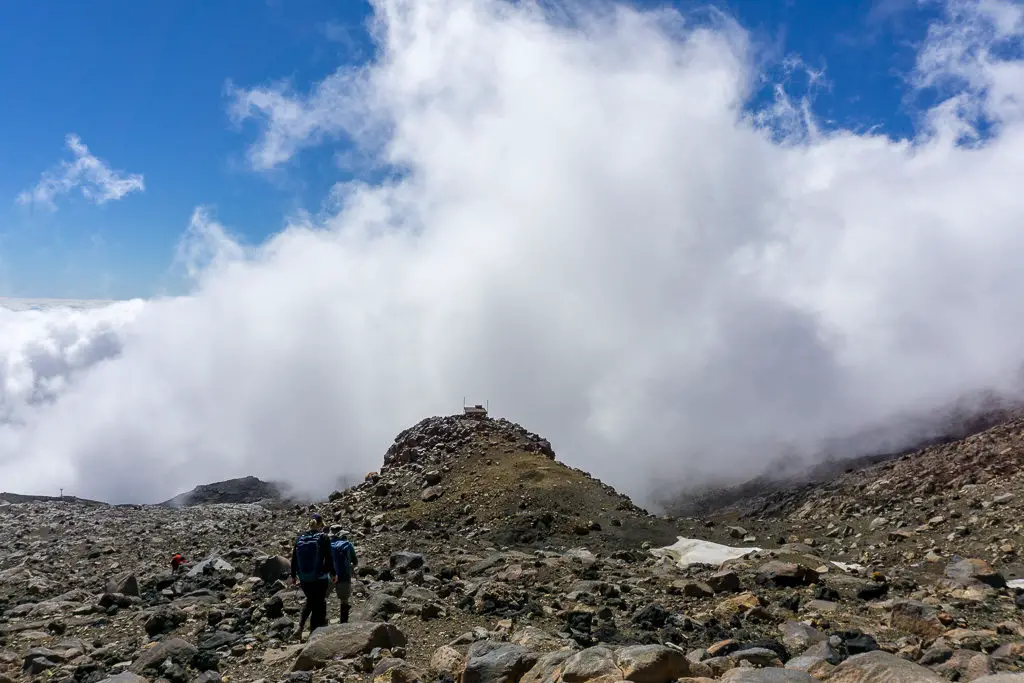
We kept following this ridge up as it joined another ridge, with Waterfall chair dropping in and out of sight on our left. Eventually the ridge opened up into a small plateau. We were surprised to stumble upon a New Zealand Alpine Club (NZAC) hut. (Although we shouldn’t have been, because it is technically marked on Topomaps). This was around the two hour mark. We were about level with the top of Waterfall Chair. This chair is the highest you can go via chairlift if the lifts are operating). So taking the lifts definitely cuts out some of the climb.
It was about here that I realised I hadn’t packed enough water for the trip. The worst kind of embarrassing rookie mistake. And because of my fitness (or lack thereof) I was going through the water I had quickly. I knew I wouldn’t have enough for the trip back down. Unfortunately the hut was locked. And the only external tap that we could find was next to the sewage tank, so I wasn’t too keen on taking that water. In the end, I melted some snow that we came across higher up that tasted vaguely sulphuric. It’s definitely safer to just be smart and take as much (or slightly more) water than you think you’ll need.
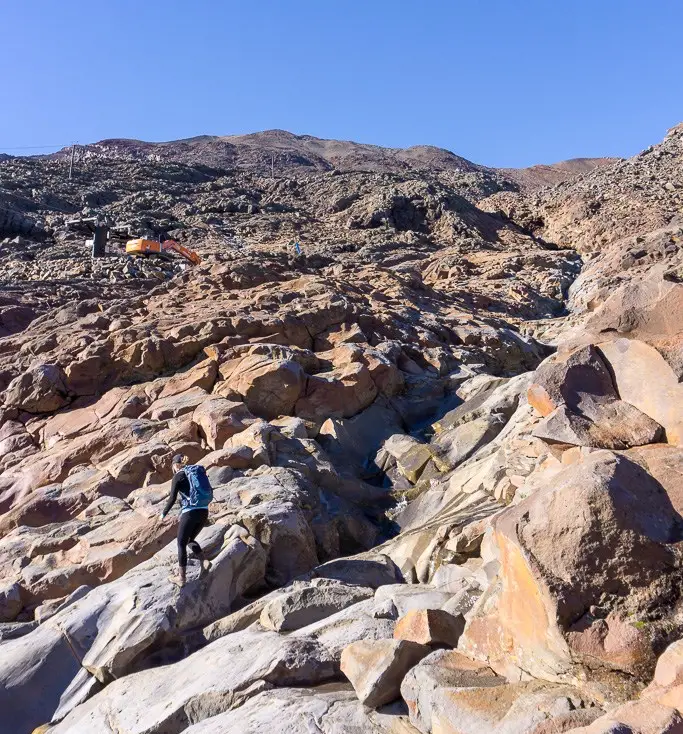
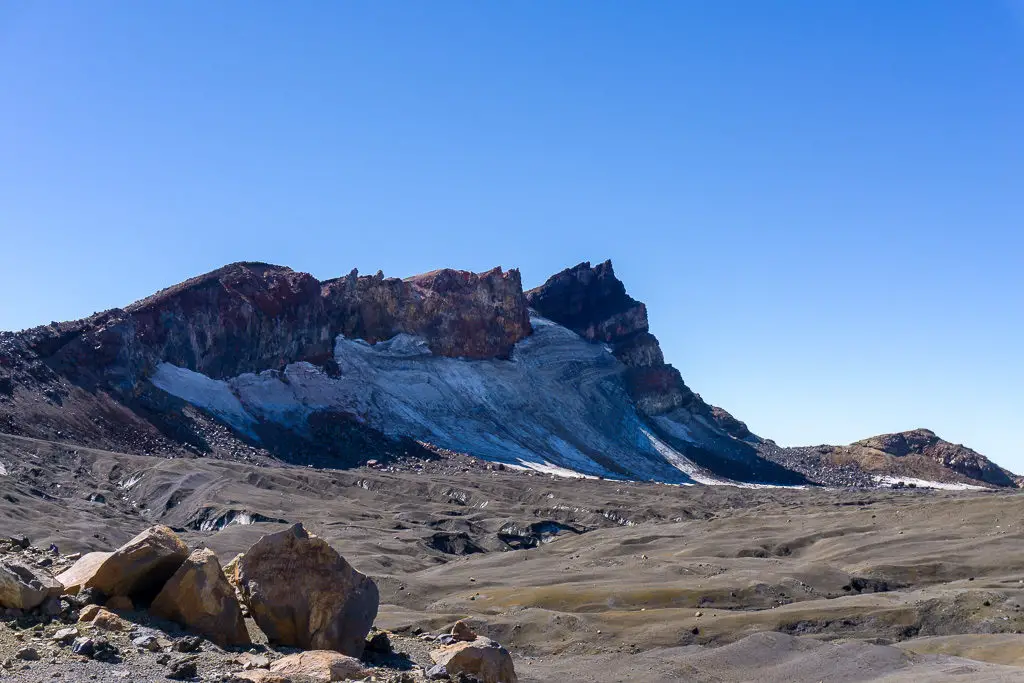
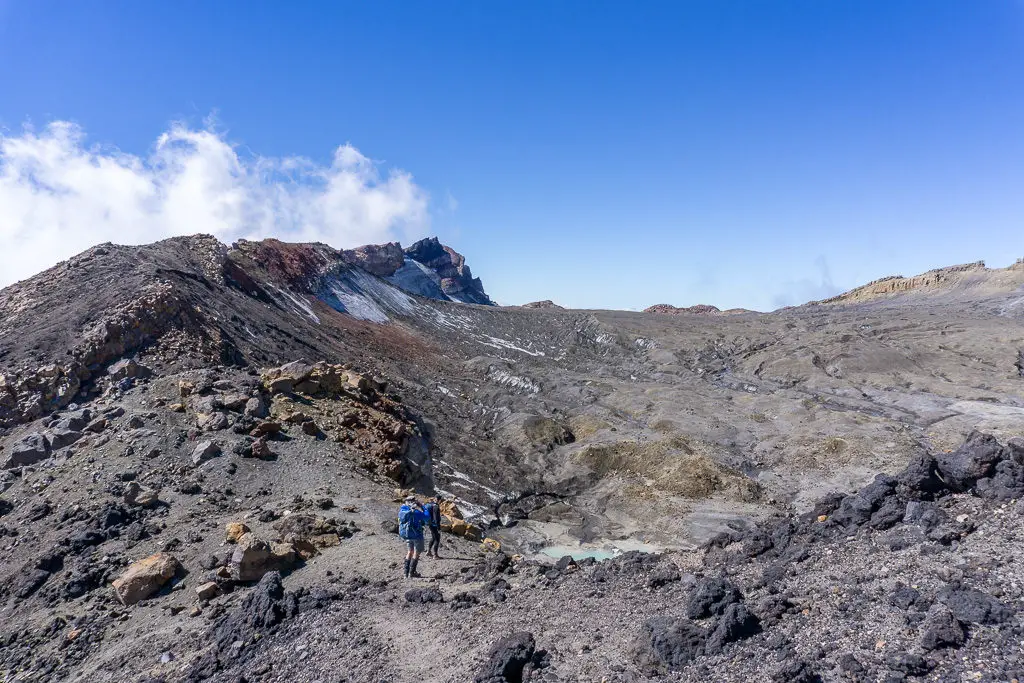
After a nice sit-down break at the hut admiring Taranaki in the distance and eating more chocolate, we set off. It was at this point that we got bluffed out for the first (but not last) time. We’d headed straight up-mountain from the hut, which ended in a steep cliff (pictured below). We had to backtrack almost to the hut and then scramble down some bluffs to the west of the hut (to your right when looking up-mountain). Once below the hut, we came across the poled track/route that we would take advantage of on the way back down. The track led us around the bluffs to the stream from which Waterfall Chair gains it name. We crossed the stream at this point to get over to the Knoll Ridge T-bar (or its pylons, since it doesn’t operate in summer).

After crossing the stream we slowly made our way across to the T-bar pylons and followed them up Knoll Ridge. This part involved quite a bit of rock scrambling but nothing technical – although I was definitely noticing it was steep. Heather out-stripped Dad and I easily. (I think Dad was just going slowly to keep me company). So she ended up sitting up the top of the ridge for a while before coming back and grabbing my pack. I was too thankful to even be embarrassed.
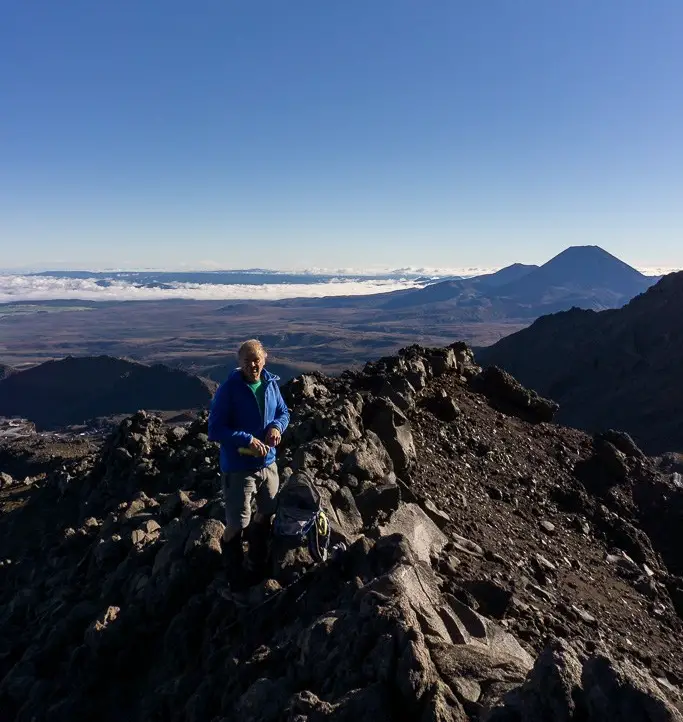
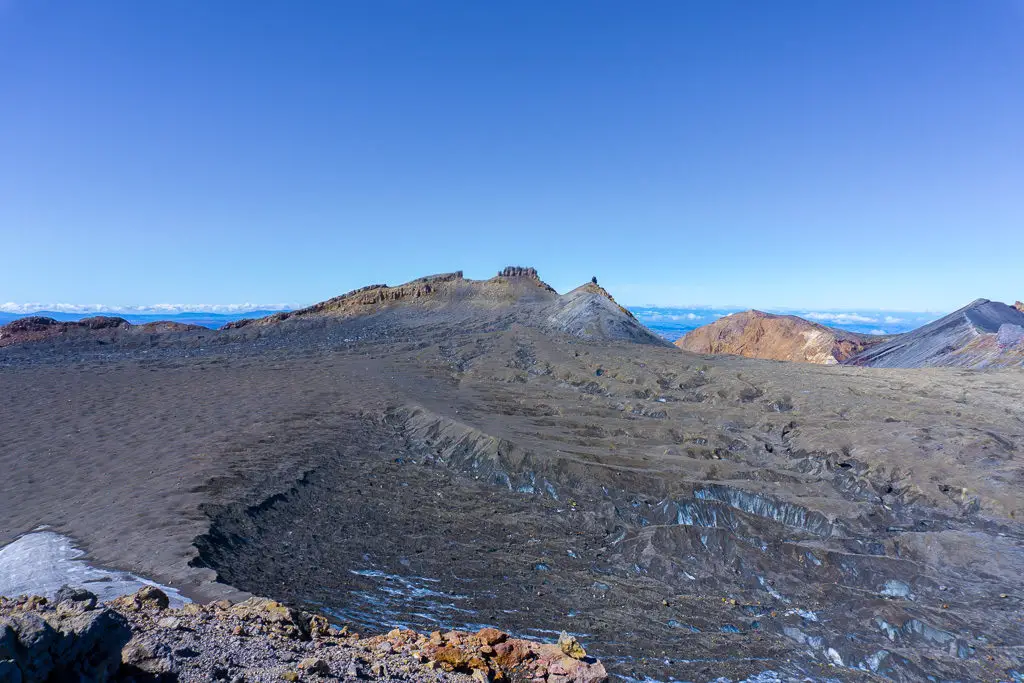
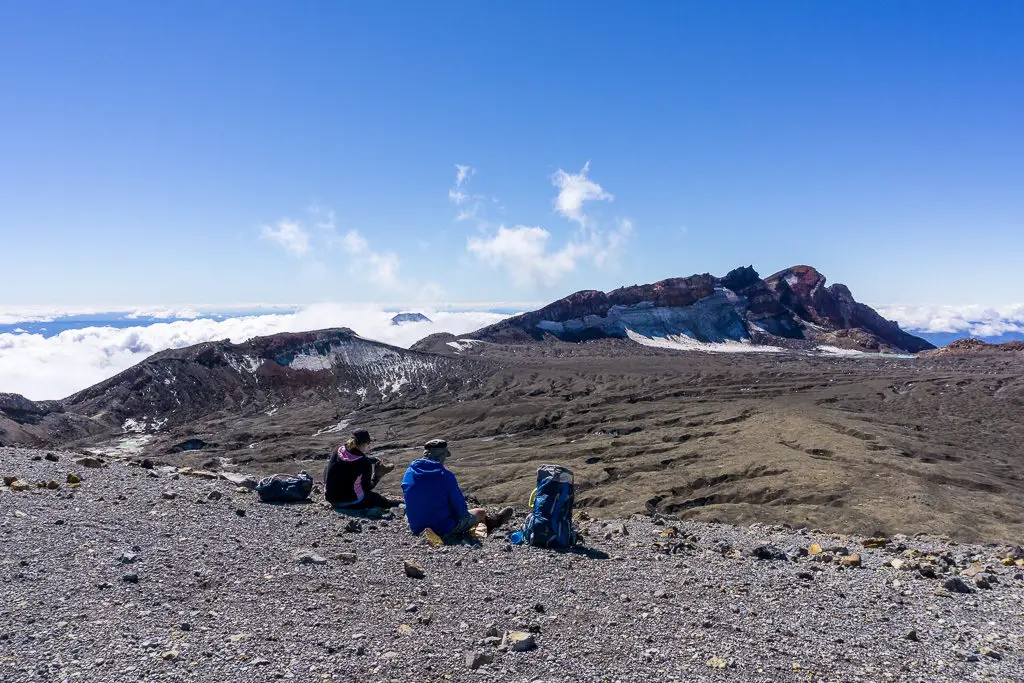
I tried to distract myself from the incline by looking at scratches in the rocks made by ski edges in the winter. (Which probably doesn’t bode well for my first North Island ski season). When I got to the top, Dad and Heather had made friends with Russell, a lovely semi-retired guy from Taranaki. He was solo-hiking up Mt Ruapehu to Crater Lake. Between them, they had been trying to figure out where to go from the top of the ridge (pictured below in their full contemplative glory), while they waited on me to lumber on up.
In the end we decided to keep heading up on the east/left of the stream and see where to go once we got closer to the skyline ridge. There were infrequent cairns marking the route this way anyway. This is the part that I struggled with the most in terms of fitness.
As I climbed one step after the other, Dad and Heather far up above me, I started feeling like I couldn’t fill my lungs. That no matter how much I breathed in, it wasn’t enough. I tried to keep going. I didn’t want to hold anyone up, but soon my strangled breathing sounded like it was coming from someone else. And I could feel panic slowly starting to creep in. I began to almost hyperventilate in a reflexive attempt to get oxygen into my system. I’ve never experienced asthma or an anxiety attack before, but I imagine that it might feel a little like this. I looked up at where Heather and Dad were far in the distance, and sat down in defeat, head between my knees trying to just concentrate on breathing, in and out, in and out.
In the end, I could only go a few metres up this slope at a time before having to stop and get my breathing back under control again. It was just a matter of putting one step in front of the other and then having a quick rest. I’d never experienced anything like this on a hike before. I can only guess it was a combination of my lack of fitness, head cold, the altitude and not wanting to hold everyone up (and so pushing myself to keep going faster and longer than I might normally have done). Heather came back down to help, which was as lovely as it was embarrassing. And we eventually managed to catch up to where Dad was waiting.
We also caught back up with Russ. After our route strategy discussion at the top of Knoll Ridge he’d rocketed off, but then found himself a bit bluffed out on some sketchy terrain below Glacier Knob. He backtracked to join our group and kept us company from here on until we made it to Crater Lake.
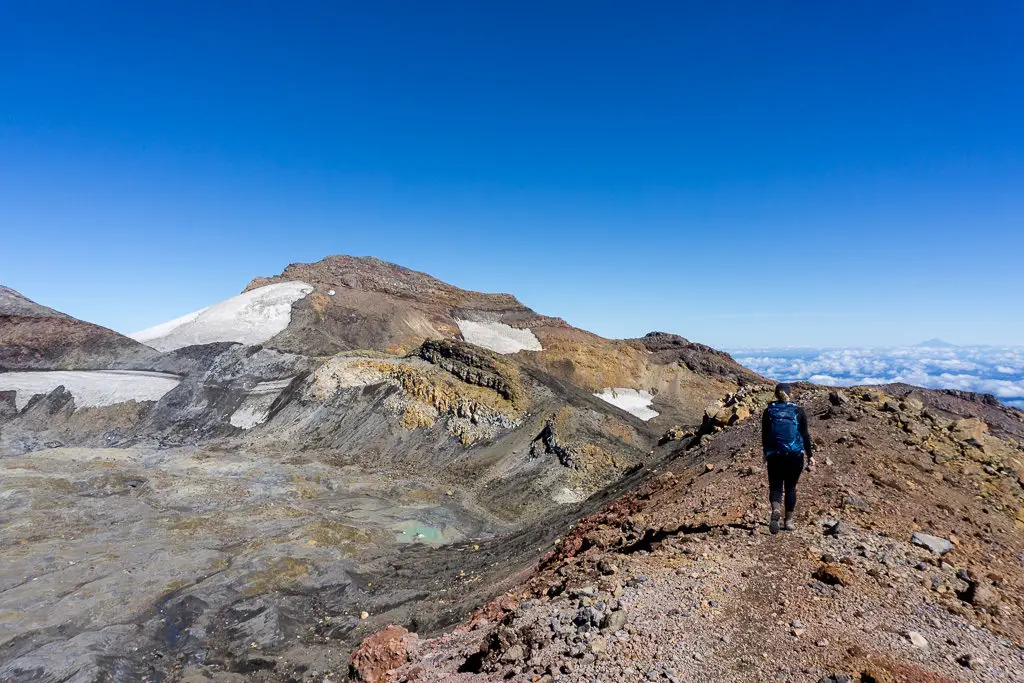
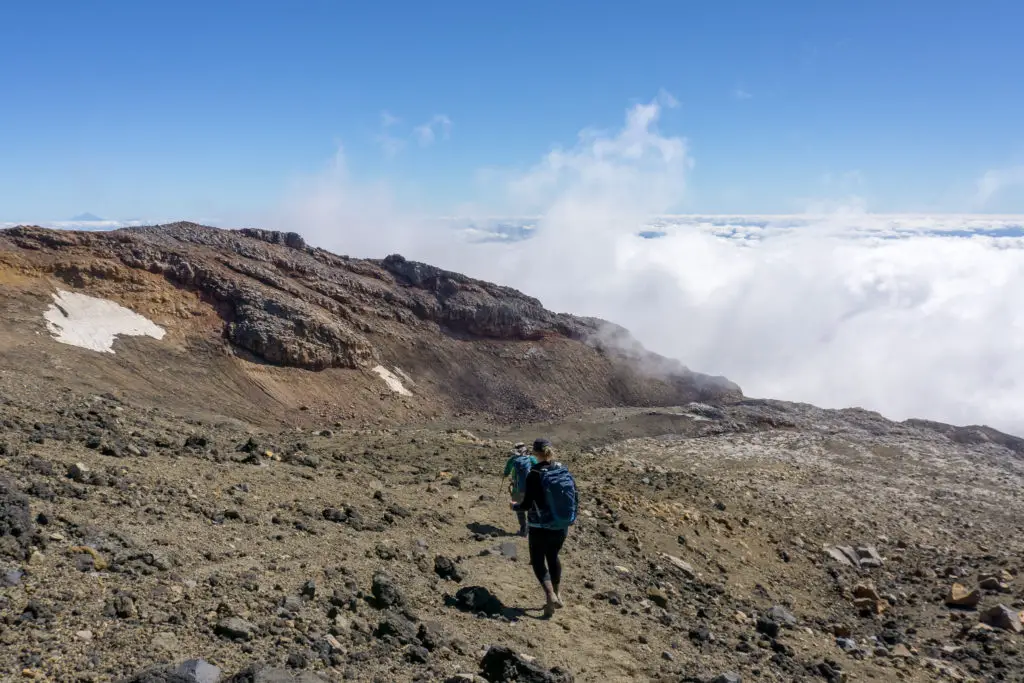
After he joined us, we turned away from the stream and headed up to our left (tracking below the rib coming down from Glacier Knob in that last photo) towards the saddle (the “Notch”) on the skyline ridge. The rock slabs of Knoll Ridge had turned to boulders (where I had struggled). And this slope now had turned to volcanic ash/scree – like walking up a sand dune. It was difficult going; if you weren’t careful, one misjudged step would slide you back two steps. But as we finally crested the skyline ridge, about 4 hours after leaving the carpark that was now so far below us, the views were worth it.
It also meant that we’d won most of the uphill battle. And now we just had to sidle up and down along the crater rim until we reached Dome. Dome is a ridge that juts out into the crater, separating the ice plateau from Crater Lake. I couldn’t take my eyes away from the spectacular cliffs, or the mesmerising ice. I stumbled quite a few times because I wasn’t looking where I was going. Luckily the breaks in the uphill meant that my breathing never got too bad. And in any case I was stopping ever few seconds to take photos.
We’d met a few parties on our way up (the first being a very loud group of teenagers at the NZAC hut, the second being Russ). From here on in there was a steady stream of people or voices below or behind us. (It was a long weekend with perfect weather, so can only assume it wouldn’t get much busier than this). We kept to the ridge running around the rim of the crater, which had relatively steep slopes on either side, but a nice wide top so it was pretty easy going. Eventually we started off on Dome, the ridge jutting into the crater towards Crater Lake.
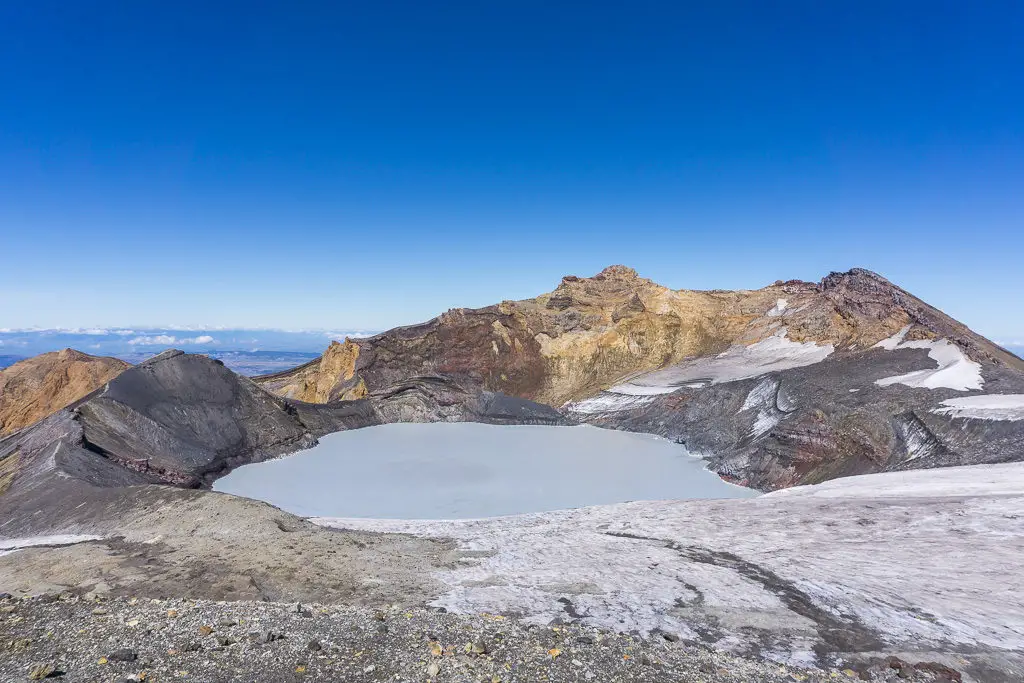
This was the final uphill push and my legs were really starting to feel it (that trembling, “are we really still doing this?” feeling). Finally we topped the last ridge and saw the steam rising off Mt Ruapehu Crater Lake. Photos don’t really do it justice. Even though I knew it existed, it still felt crazy coming across this lake at the top of a mountain. It was mesmerising watching steam rising from the hot water and dance across its milky surface.
We stopped here for lunch. As did the group of loud teenagers (one of whom was wearing jeans, enough said), with their millions of selfies and live videos. I like social media as much as the next millennial, but there’s a time and a place to loudly shout about how you’re using it. The top of Mt Ruapehu probably isn’t that place. (I judge, but then I was the unfit one who hadn’t packed enough water for myself, so maybe I shouldn’t throw cyber stones).
As non-peaceful as it was, it was still really cool to see lots of people making the most of a beautiful long weekend by getting out and experiencing the outdoors. Mt Ruapehu is a big mountain and no tracks means not everyone has to take the same route, so apart from the viewpoint which funnelled everyone in to the same spot at a similar time, the rest of the trip was pretty quiet. It never felt like there was a lot of people.
Russ was starting to get antsy about the cloud coming in from below the crater. Living near Taranaki gives you a very healthy respect for the mountains. And how dangerous changes in weather came be when you’re on their slopes. So after taking some group shots and swapping numbers (just in case he was ever down south or Dad was ever up near Taranaki), he left early. While Heather, Dad and I had a leisurely lunch, took some more photos. And I quietly took some live videos.
Too soon though it was time to leave. We said goodbye to Crater Lake, turned our backs on its steaming waters and started the long hike back down.
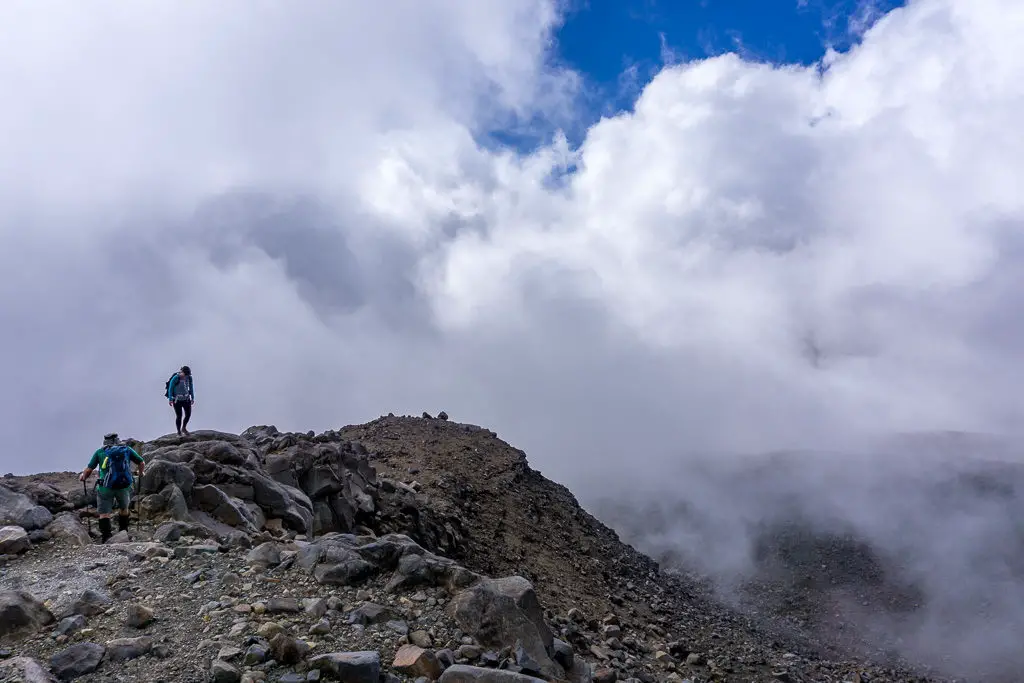
We decided to take a different route down since we didn’t want to hike all the way up and over Glacier Knob again. Generally speaking, you should take the same route both up and down the mountain, retracing your steps. This way you’re more likely to know where you’re going (and less likely to become lost). This is especially the case with weather coming in, as it was for us. as soon as we dropped 100m or so below the crater rim, we were in patchy cloud.
But we’d scoped this route out on the way up, had our maps prepared, and were ready to follow our noses. The only real danger was getting bluffed out and having to retrace our steps. This would mean wasting time and energy going back up-mountain to find a better route down. This did happen once. Luckily we only had to backtrack a few tens of metres before being able to drop (quite literally) down. But for someone who hasn’t prepared sufficiently or doesn’t have experience, these kind of conditions can be very disorientating and lead to panicked decisions. You could end up walking in the wrong direction or into dangerous situations with cliffs. So prepare adequately and/or have someone in your party who has experience route-finding.
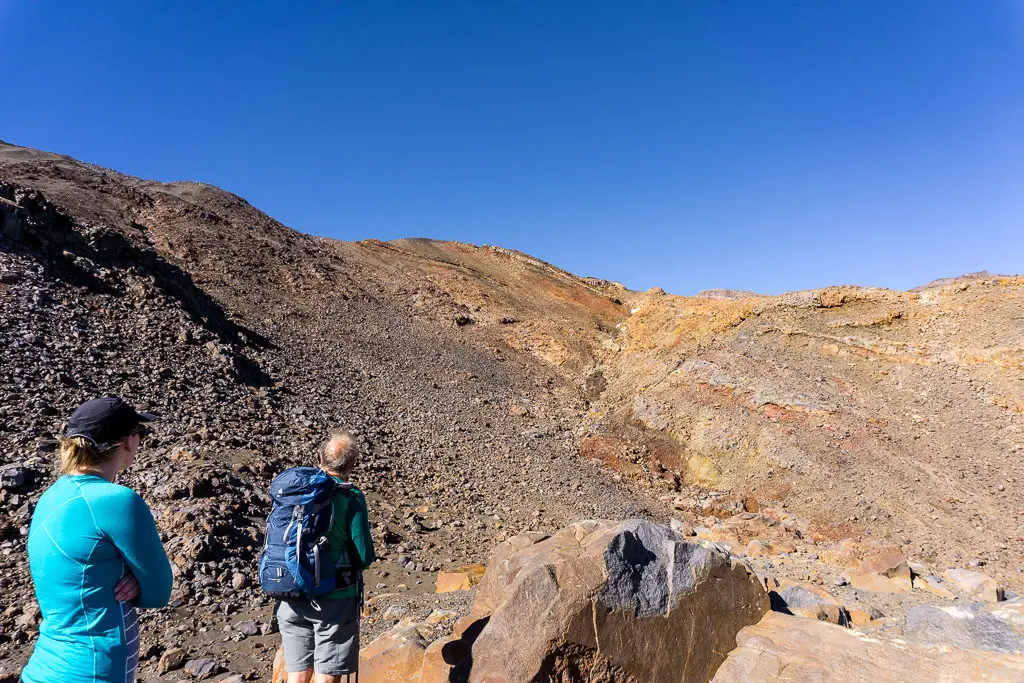
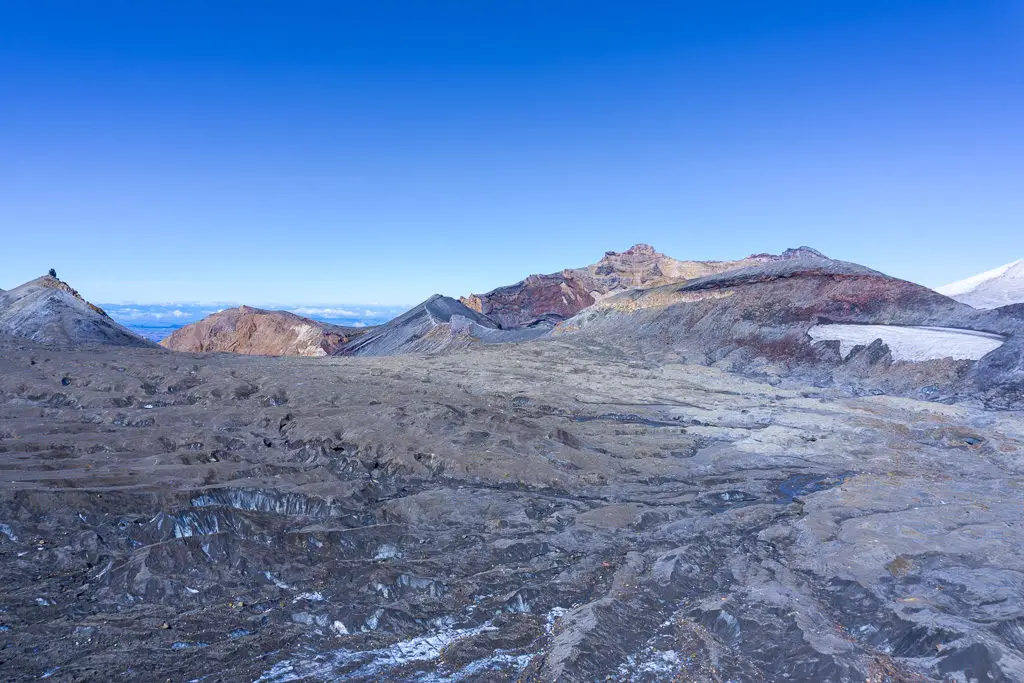
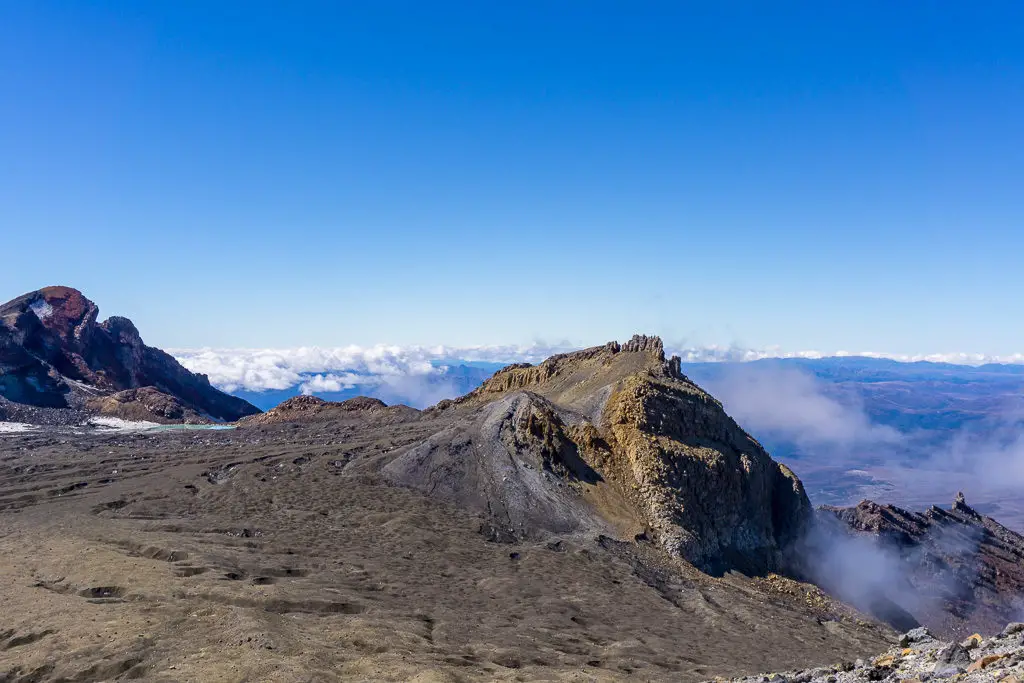
We dropped down to the top of the creek/valley that we’d looked so intensely up at from the top of Knoll Ridge when trying to figure out where to go (pictured below), and had a quick break.
From here, we could try and sidle back around to the right and find the route we’d taken on our way back up (and which might have been the smarter thing to do initially instead of climbing sideways up to the Notch and then up and over Glacier Knob). Or we could continue down Restful Ridge. We decided to do the latter. Judging by the worn track we’d just taken down from Dome, it was a popular route. And we had the (admittedly, very sparse) route info from when I’d done my initial research. It would also be a lot quicker. And at this point we just wanted to get down and off the mountain.
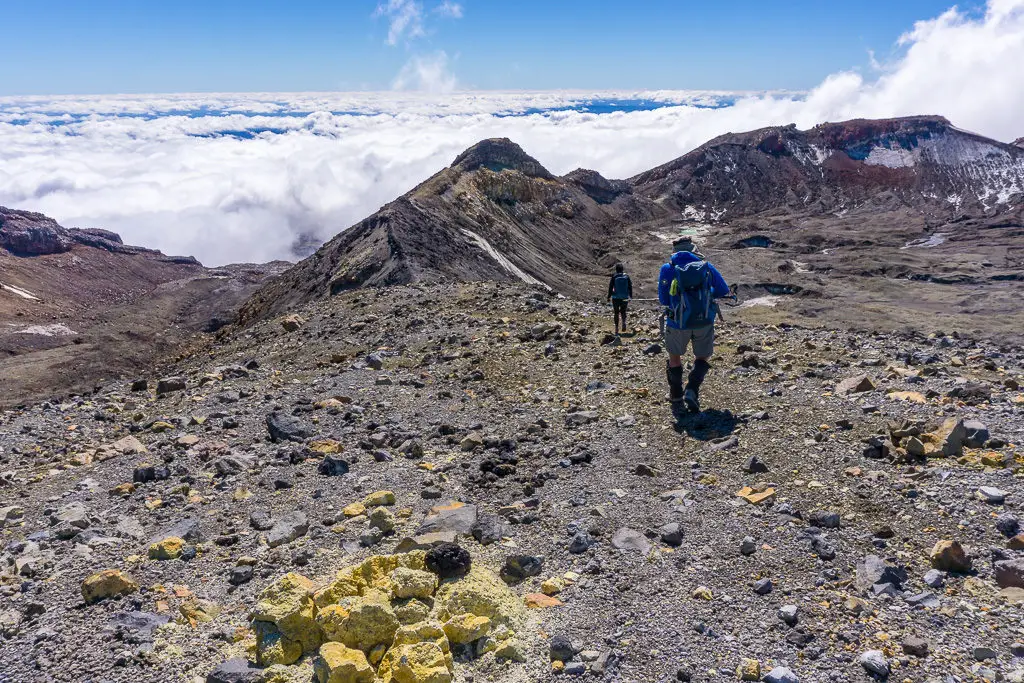
Rock cairns guided our way for a while (thank you to the many trampers who added to them). But soon visibility meant that they weren’t the easiest to follow so we stuck to the ridge and continued on. At one point we got bluffed out following the ridge. In a brief clearing of cloud I spotted some cairns in the valley below. We backtracked a few metres before dropping our bags (and then ourselves) down the bluffs and continuing on in the valley. This wasn’t quite as easy going on my ankles as the clearer ridge had been.
Dropping down into the valley meant that we had found a worn track again. We followed it (on and off) all the way down to bottom of the bluff below the NZAC hut. Just a few moments after I took the below photo, I managed to somehow wipe out in such a spectacular way that I don’t think I could have topped it, even if I’d been trying.
My feet slid out from under me. My legs went up in the air. I turned to try and save myself, landed on my hip (luckily on gravel and not boulders) and then slid uncontrolled for a few metres before coming to rest somehow on my stomach. My glasses and hat were pushed off my head at some point and were lying up-slope from me. Even my little pack was all twisted around to my side. And there was dirt and gravel up my pants to the knees. But my bones were all non-broken. And my camera was still safely wrapped in my extra merino layer in my bag.
I lay on the ground for a while, amazed and very thankful that I wasn’t more hurt than a few grazes and bruises. The fall had been so ridiculous that I felt like it must have been a cartoon banana peel I’d slipped on, and I started to cry-laugh while still lying on the ground. In my defence, I was pretty tired at this point. And imagining a cartoon banana peel seemed funny at the time.
After realising how crazy I’d seem if anyone came across me lying on the ground cry-laughing, I got up, tried get the dirt out of my clothes and hair, collected my belongings that were strewn along the track above me, and gingerly continued on making my way down to catch up with Heather and Dad. When I told my partner about this afterwards, he was impressed I’d managed to yard sale without even being on skis/snow.

I eventually caught up to Heather and Dad by the NZAC hut bluff. They hadn’t heard me falling or cackling, which was a plus. This time instead of climbing back up to the hut, we followed the poled route around the bluff, down a valley (with the ridge we’d climbed up that morning above us on our right) and then onto the lower ridge above Schuss Haus.
Heather kept going at this point as nature was calling and Schuss Haus had toilets. (And it closed at 4pm, same time as the chairlifts, which was only about 15 minutes away). Dad and I had our last sit-down break for our knees’ sake, before heading down as well. We arrived at the bar just after 4pm. But the music was still pumping so we went inside and the bar tender definitely did not serve us cider and beer, being Good Friday. Our drinks were beyond refreshing, and were the perfect (almost end) to our hike. The last 15 minutes were the easiest. Just following the same ski-field road back down to the carpark, arriving back about 8.5 hours after we’d started out.
For me Mt Ruapehu Crater Lake was a challenging hike physically and mentally, but an amazing adventure that I’m proud of seeing through. I’m very lucky to have family who are crazy enough to plan these trips with. And who are supportive when the going’s tough. Here’s to more Milne adventures!
Helpful Tips for Mt Ruapehu Crater Lake
- Mt Ruapehu is an active volcano whose last eruption was 2007. Volcanic activity is hard to predict, but make sure to check DOC and Geonet for current alerts before setting out. If you hear the alert siren while on the mountain, get out of the valleys. These can be lahar pathways.
- This is a route only with no tracks or markers. You have to be confident route finding (especially as the weather often comes in from midday onwards reducing visibility, as you can see above).
- We completed Mt Ruapehu Crater Lake in autumn with minimal snow. At other times of the year (especially winter and spring) you’ll need experience in alpine conditions.
- There is no water or shelter above Knoll Ridge cafe. Make sure you’ve got enough water and gear to cope with the changeable conditions.
- Mt Ruapehu is the highest mountain in the North Island. If you’re unfit, unwell or have respiratory problems, you may feel some effects from the altitude (if you’re fit and healthy it shouldn’t be an issue).
- The Whakapapa ski-field chairlifts operate some of the time over summer/autumn with limited hours. These can cut out about 2 hour of uphill and 1 hour of downhill, so may be worth the ticket price. Only the lower one was working when we went, so it wasn’t worth it for us. They start operating at 9am and last chair is at 4pm. So make sure you don’t linger or get lost, otherwise you’ll be walking all the way down.
- Although the thought may cross your mind on a cold, windy day – don’t swim in the lake. It may be warm, but it’s also sulphuric and acidic – between 1-5 pH, a.k.a not nice for humans.
Safety for Mt Ruapehu Crater Lake
As always, please stay safe when you’re out exploring. Follow the Outdoor Safety Code:
- Choose the right trip for you (read my article on tramping safety, talk to DOC)
- Understand the weather (especially important when you’re heading up so high and for such a long day. We started off with not a cloud in the sky and then had very poor visibility in the afternoon).
- Pack warm clothes and extra food (including warm, windproof clothing, regardless of how calm or warm it is when you set out. Check out my post here about what gear you need to take)
- Share your plans and take ways to get help (carry an emergency beacon on your person)
- Take care of yourself and each other
Mt Ruapehu crater lake is not a trip to be taken lightly. But for those willing to put the effort and preparation in, it’s well worth it!
If you’re not feeling super confident then you can always get in touch with me here on the blog or on my Instagram. Or take a look at my Tramping 101 series which includes this post about how to stay safe in the outdoors.
Also don’t be a dick, check out my guide to New Zealand tramping etiquette.
Stay safe and get outside!