The Cascade Saddle Route is an adrenaline-inducing challenge in Mt Aspiring National Park with sheer drop-offs and incredible views of the Matukituki Valley, Dart Glacier and Tititea / Mt Aspiring.
Length: 15km
Elevation gain: 1300m+ (my watch read 1759m cumulative gain climbing up)
Time taken: 1-2 days depending on fitness and willingness to camp at Cascade Creek. Detailed times with checkpoints at end of article.
Difficulty: easy to Aspiring Hut, then extremely steep to Cascade Saddle with multiple sheer drop-offs
Facilities: Raspberry Creek carpark at the trailhead has a shelter and long-drop toilets. Aspiring Hut is a New Zealand Alpine Club (NZAC) hut 2 – 3hrs up the track. You can pay for hut tickets ($30 per person) at the DOC Centre in Wanaka or to the ranger at Aspiring Hut in season (late November – April). It is a 33 bunk historic hut with gas, flush toilets, lighting (over the summer season) and a fireplace. At the designed campground at Cascade Creek there is a long-drop toilet and ample drinking water from the stream.
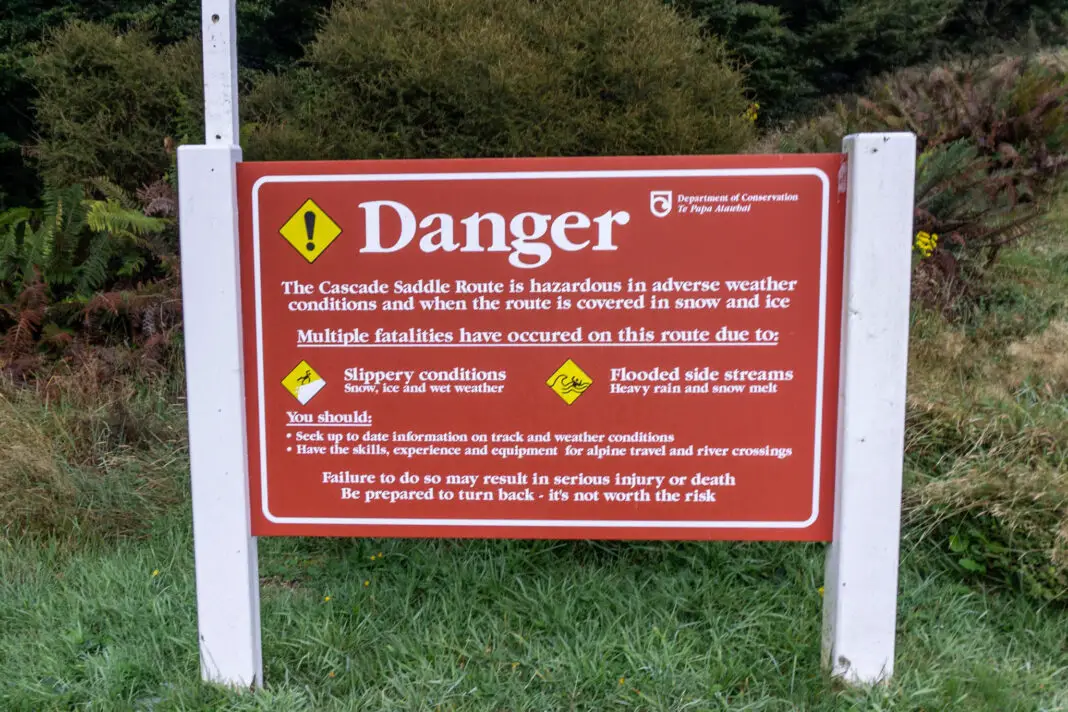
– Important: This route has seen multiple fatalities from people slipping and falling (often in snowy, icy or wet conditions). If you have a fear of heights, this is not the trip for you. Always check the forecast and go prepared for what conditions you’ll encounter (e.g. tramping boots or shoes with good grip, crampons and ice axe). Don’t be afraid to turn back if needed. –
How to get to the trailhead for the Cascade Saddle Route
Raspberry Creek carpark is the trailhead for many hikes including Cascade Saddle, French Ridge Hut, Rob Roy Glacier, and Liverpool Hut. In summer it can be very busy. The carpark is just over an hour’s drive from Wanaka, on a mixture of sealed and gravel roads.
Take the Wanaka – Mt Aspiring Road towards Treble Cone ski-field. Once past the ski-field turn-off, the road turns to gravel with numerous unbridged fords. In summer, 2WD vehicles can normally cross these without too much hassle (as long as it hasn’t been raining). But later in the year you’d probably need a 4WD.
If you’re looking for hikes near Mt Aspiring National Park and Wanaka, check out these trips:
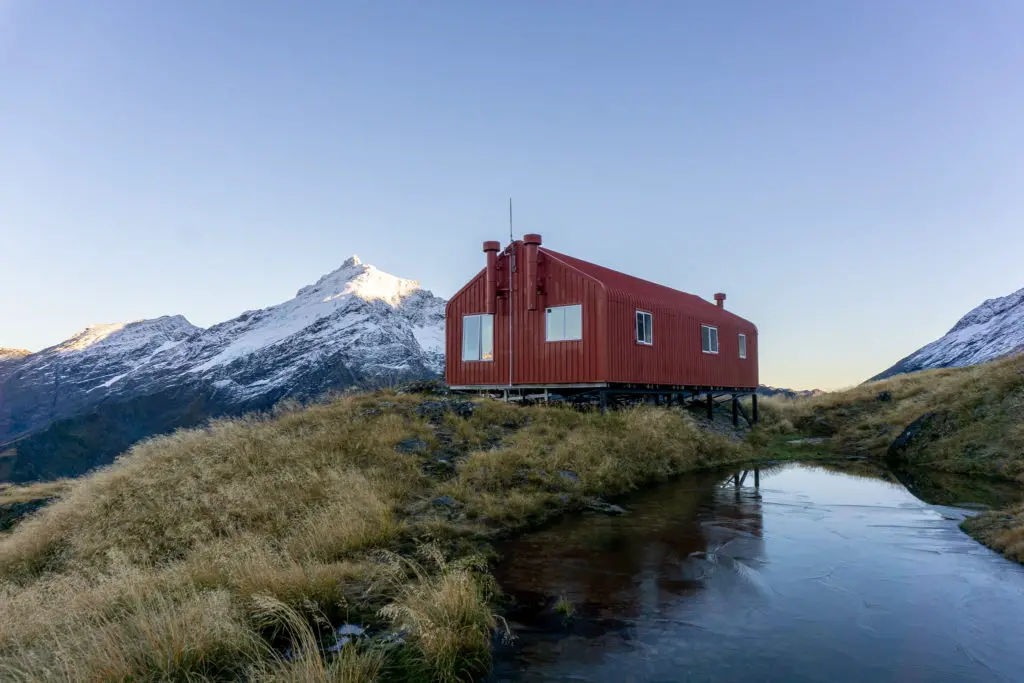
French Ridge Hut
A beautifully situated red alpine hut, and a majestic long-drop with views over the surrounding mountains and glaciers, is the reward for this steep climb up the side of the Matukituki Valley.
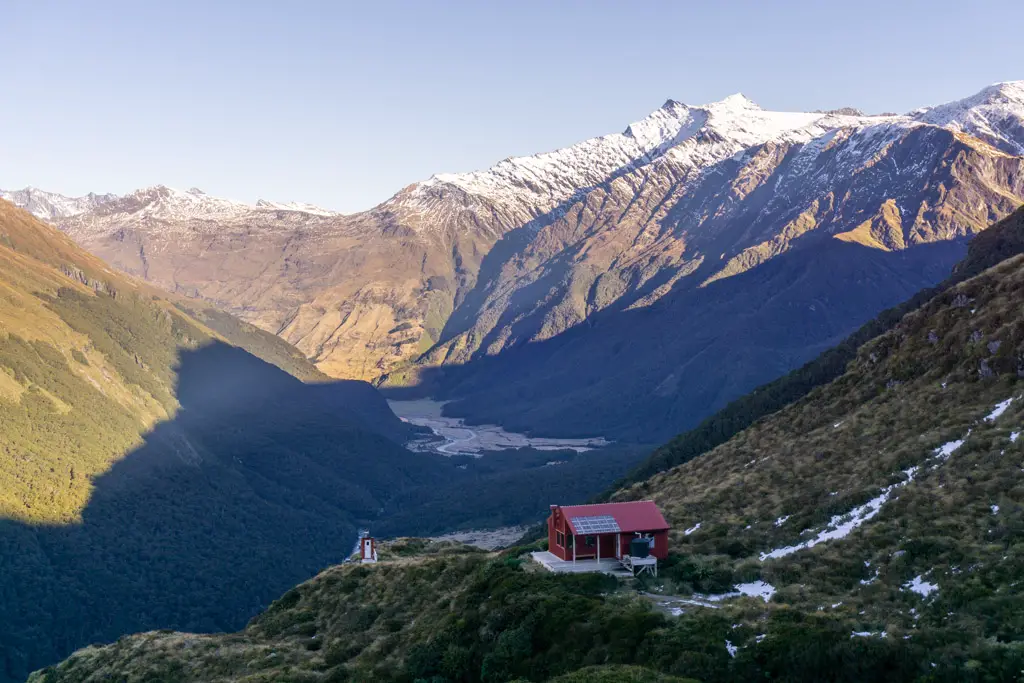
Liverpool Hut
Opposite French Ridge Hut sits another cute little red hut with amazing views down the Matukituki valley towards Cascade Saddle.
Climbing the Cascade Saddle Route
Aspiring Hut
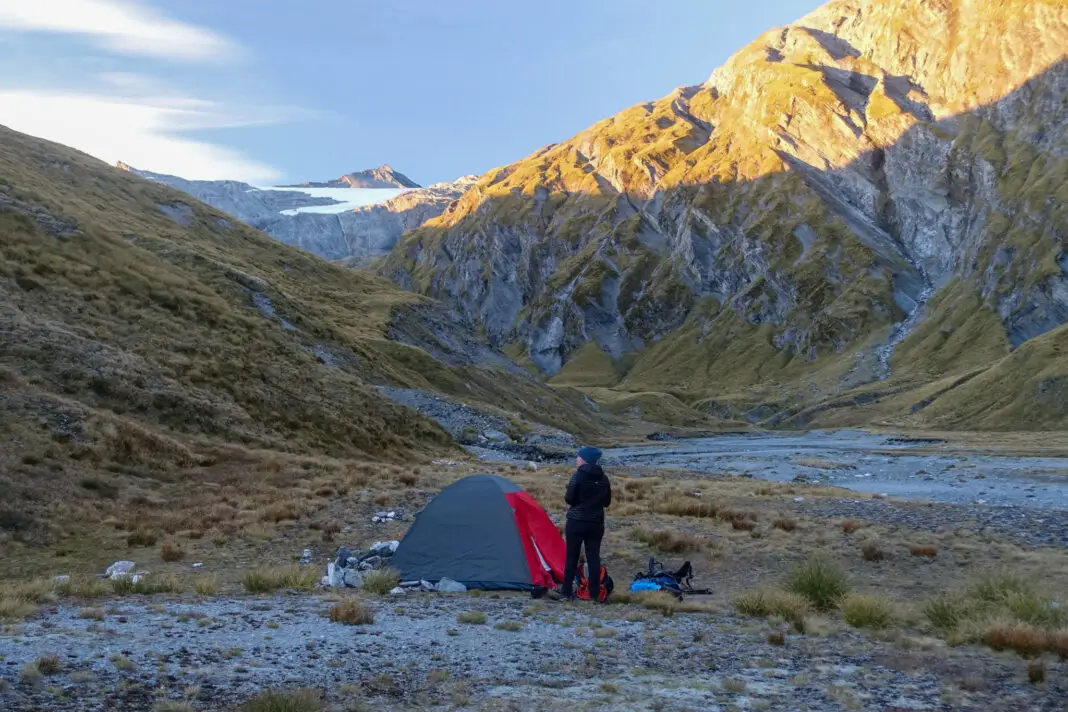
Cascade Saddle had been on my to-hike list for a long, long time. After a summer of pushing myself further with longer and more complex tramping trips, I felt prepared for the physical and mental challenge of the Cascade Saddle Route. My husband Matt doesn’t like heights, so this wasn’t the trip for him. But my mountain goat of a dad was keen to join. We lined up a few free weekends and crossed our fingers for good weather on at least one of them.
Our chosen day dawned with clear skies and a slight white tinge on the tussocks, one of the first frosts of the year. The frozen ground wasn’t the nicest on my foot (which was still suffering some plantar fasciitis from the Hump Ridge Track the weekend prior), but the first two and a bit hours to Aspiring Hut passed very quickly. If you want more information on this part of the track, check out my French Ridge Hut trip report.
At Aspiring Hut we looked up at the horizon far, far above us. Something in me whimpered slightly.
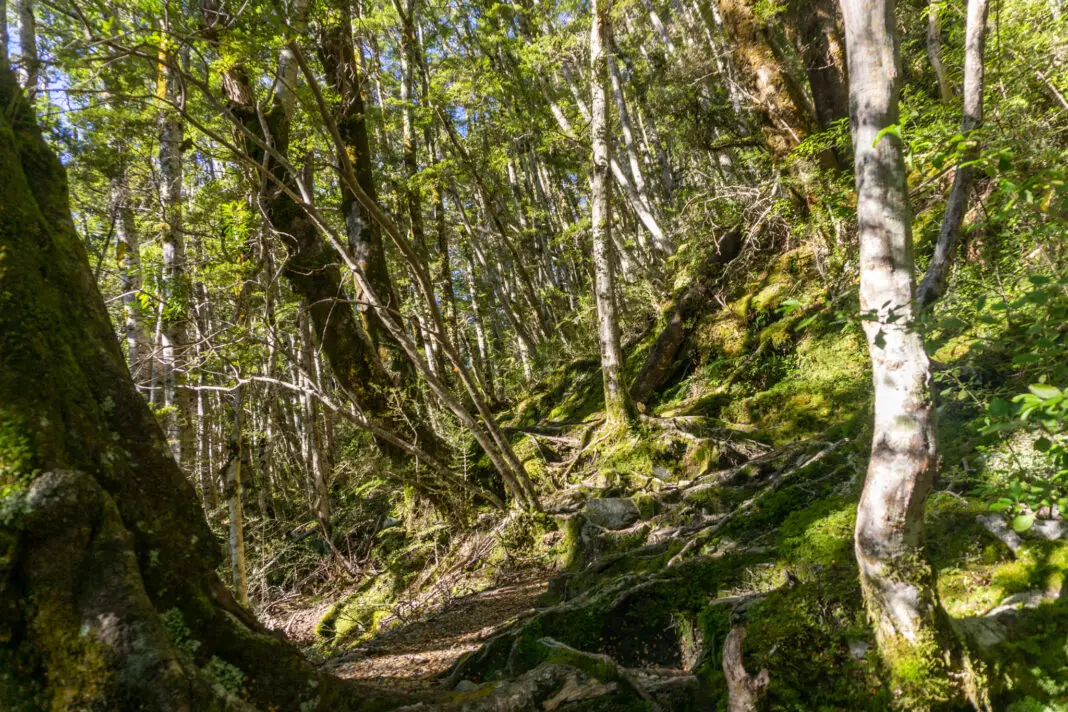
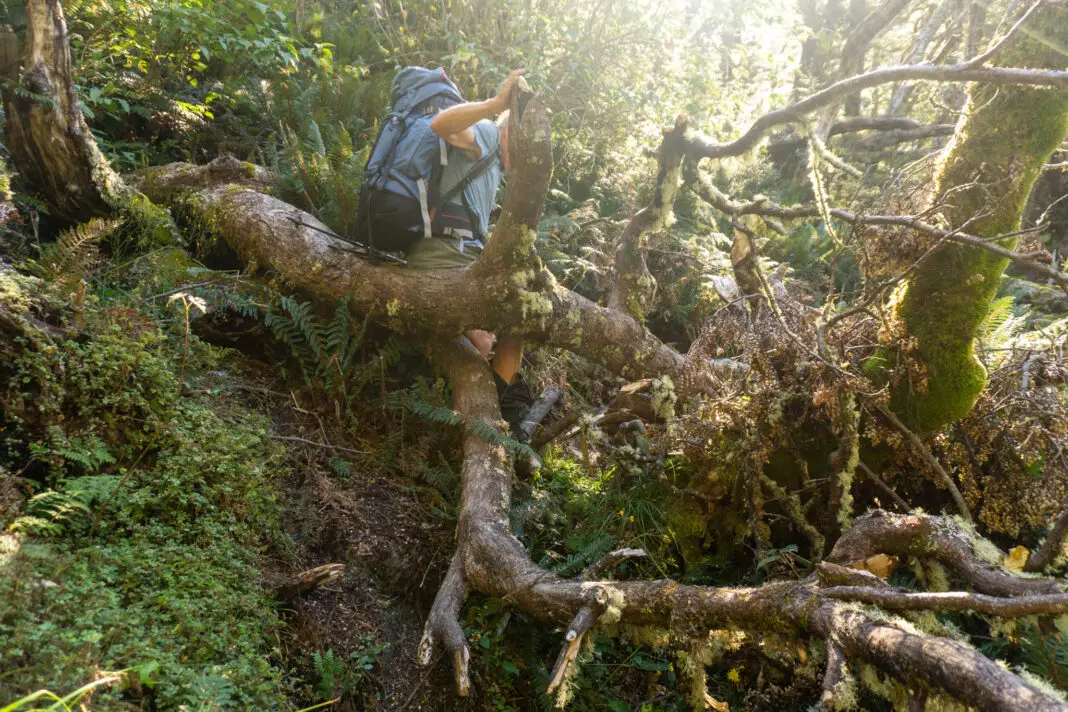
Climbing in the bush
The track for the Cascade Saddle Route is sign-posted just before Aspiring Hut. We plunged into the beech forest and almost immediately started climbing, steadily and then more steeply. The track was well-worn and obvious, although uphill (read: climbing up a wall of tree roots in parts). It was very similar to French Ridge Hut and Liverpool Hut further up the valley.
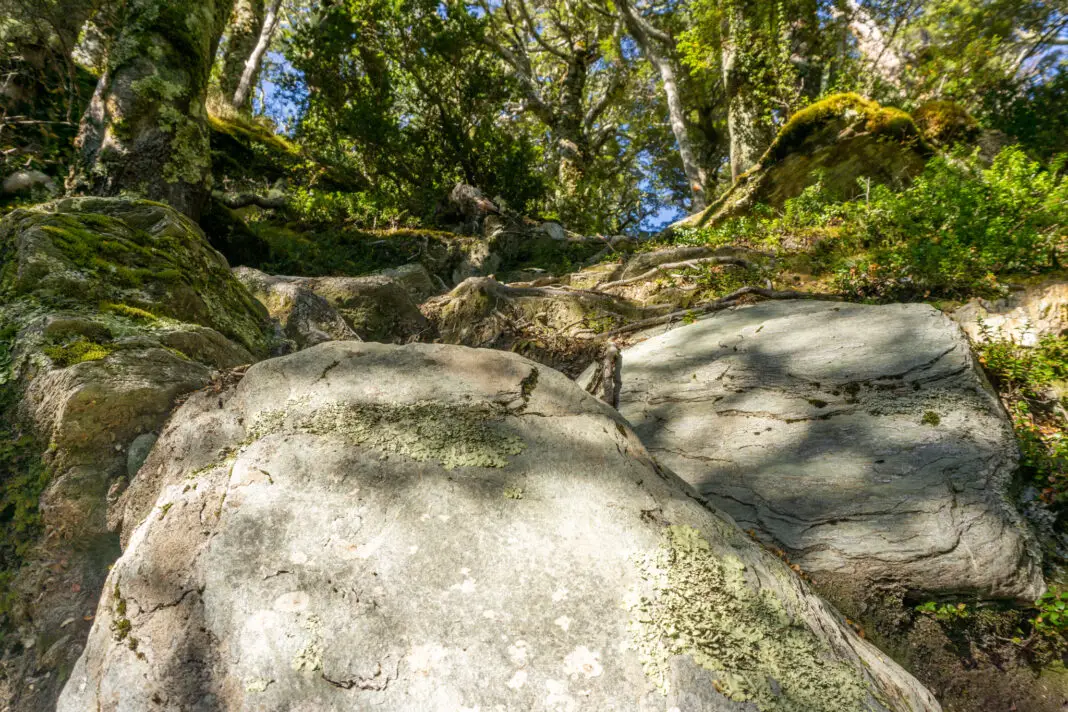
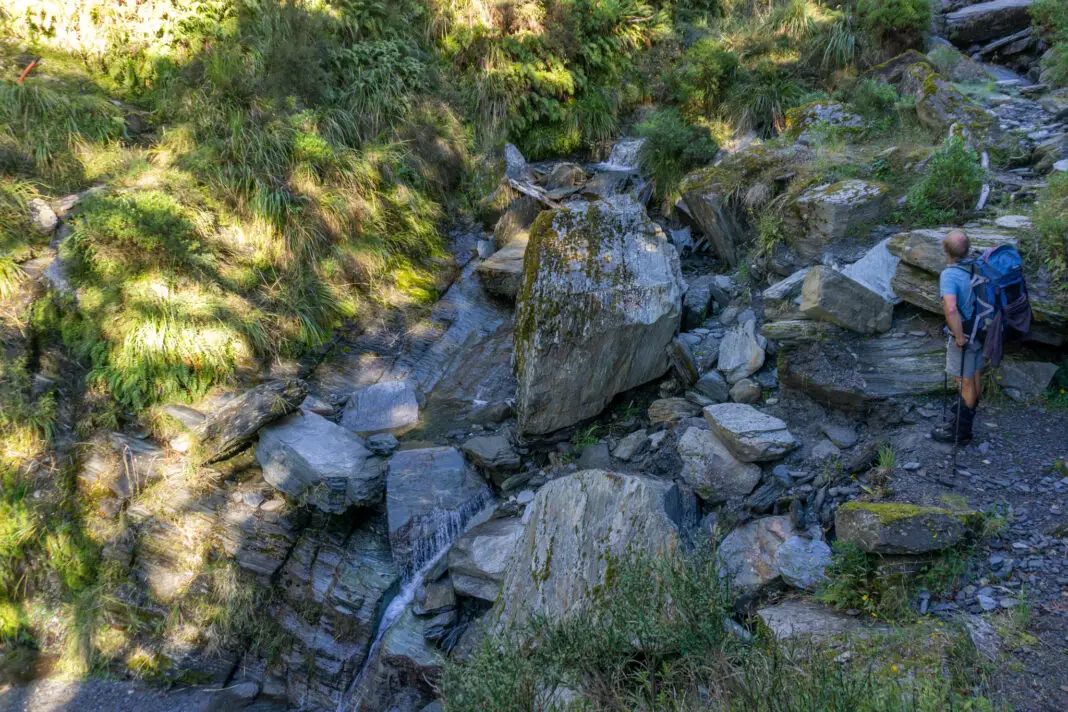
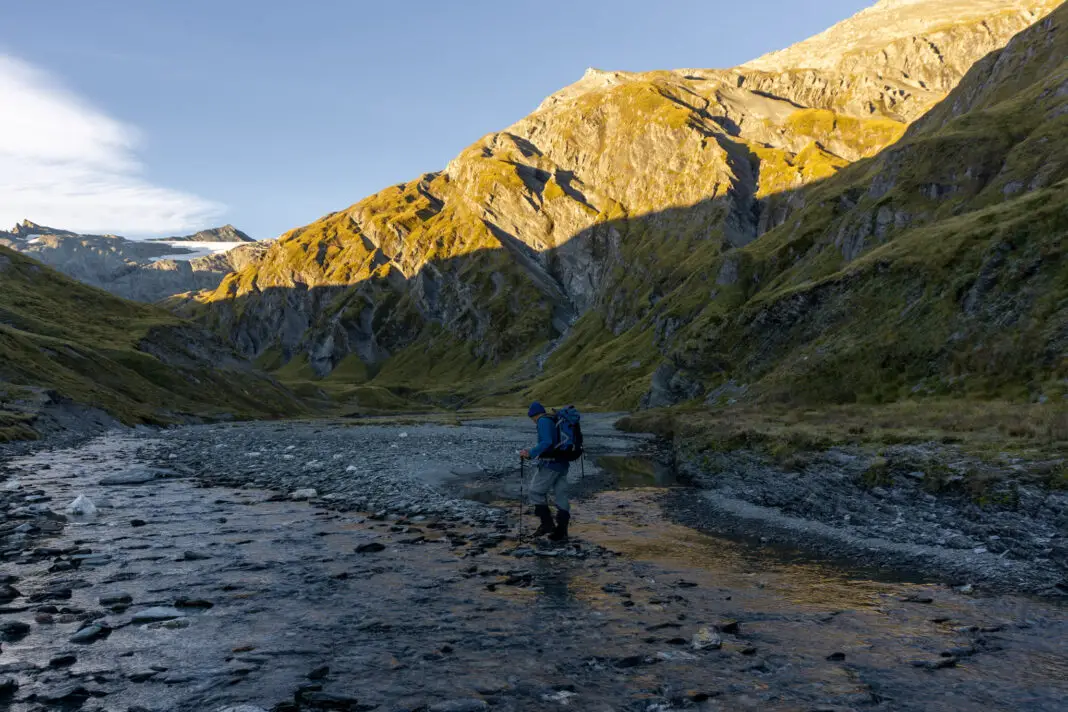
The first checkpoint was a stream crossing in the bush, just over an hour and half from Mt Aspiring Hut. This marks two-thirds of the way to the bush-line; with about 500m vertical already climbed and another 200m to go. We had a good rest at the stream, and filled up our water bottles / bladders. This stream is the last water source before the Cascade Stream campsite, many gallons of sweat and swear words away. In heavy rain I imagine it would be dangerous to cross – just look at the boulders it’s been bringing down!
After the stream the track got a bit steeper, but it also started teasing us with views framed by the beech trees. It took another 30-45 minutes from the stream to reach the bush-line (three hours total including breaks).
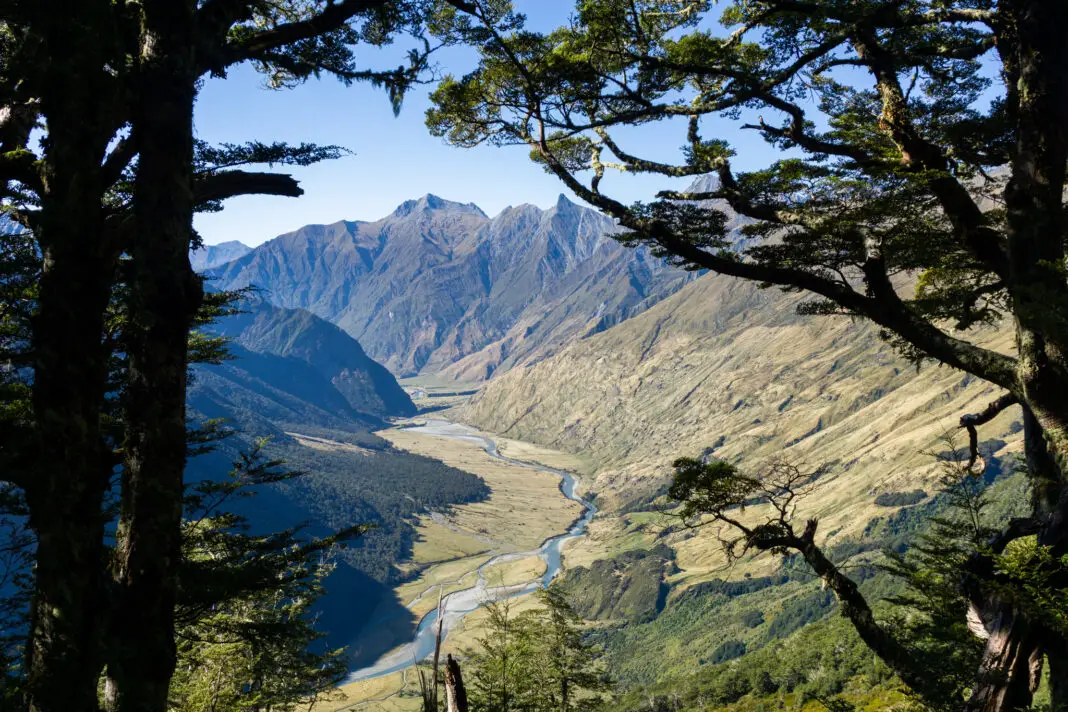
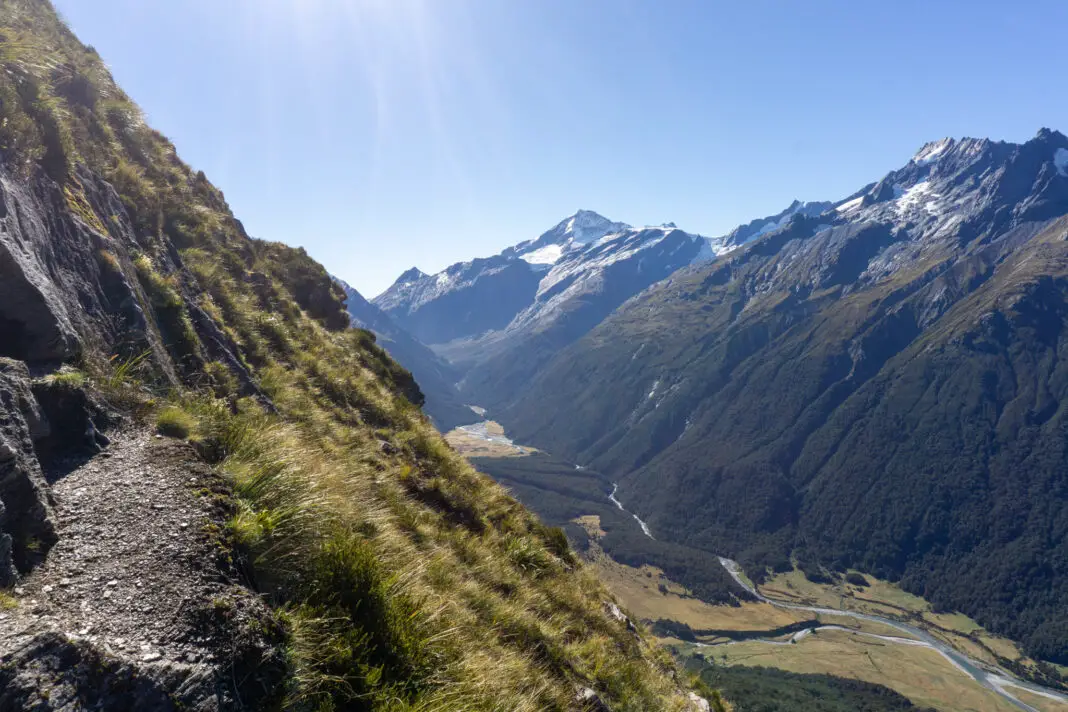
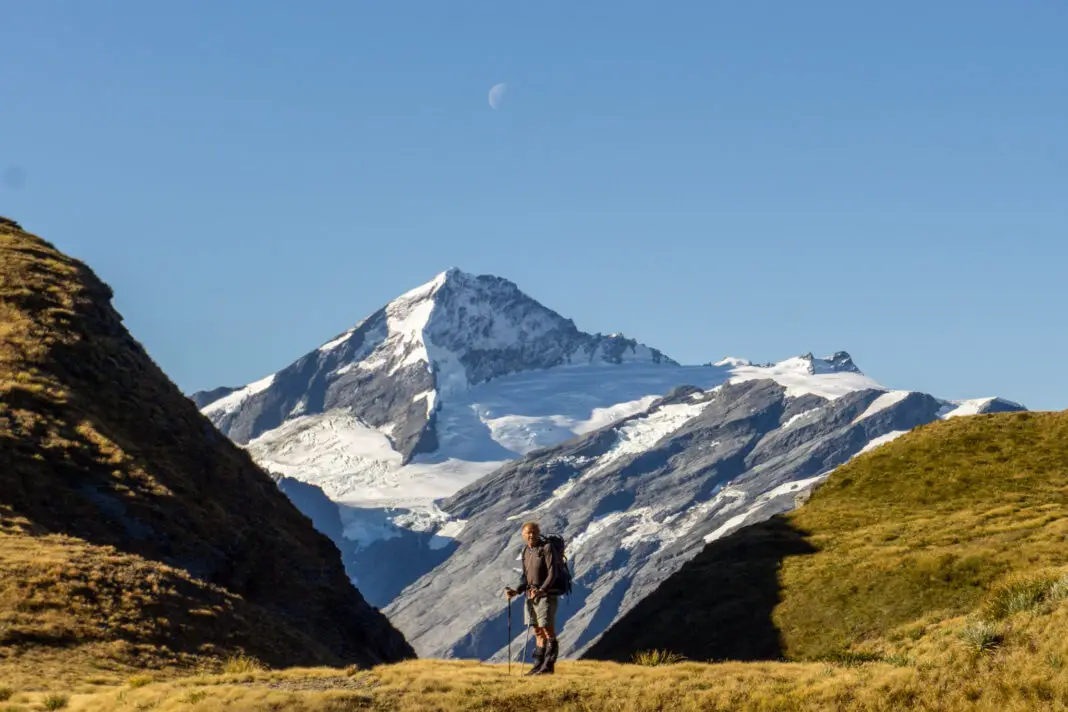
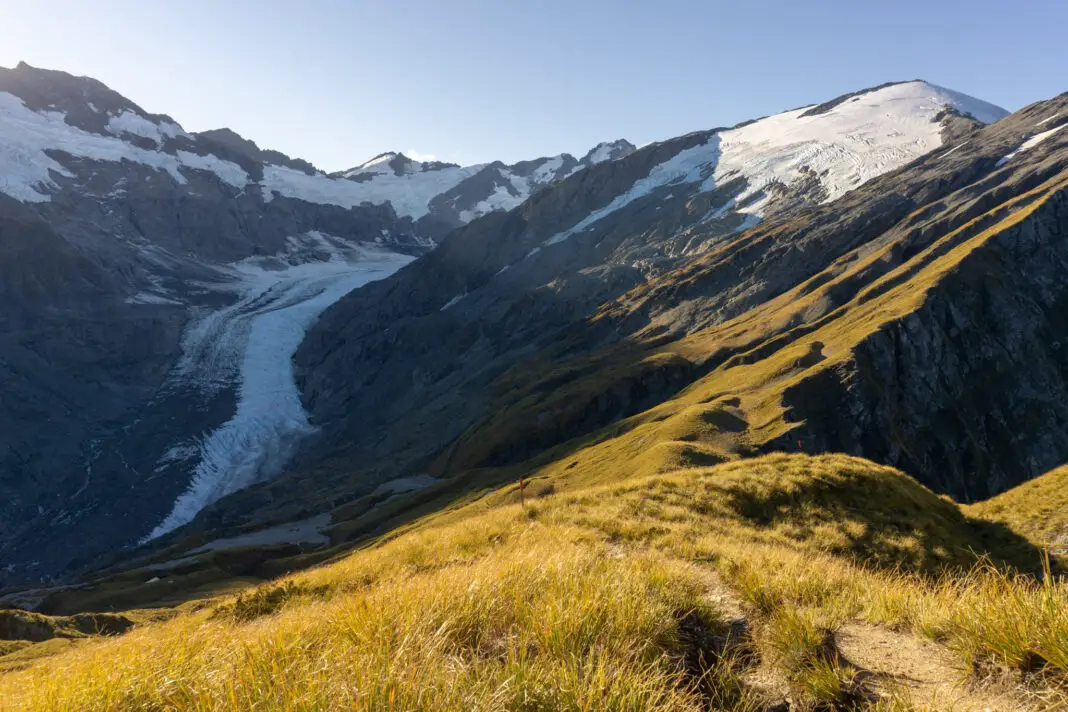
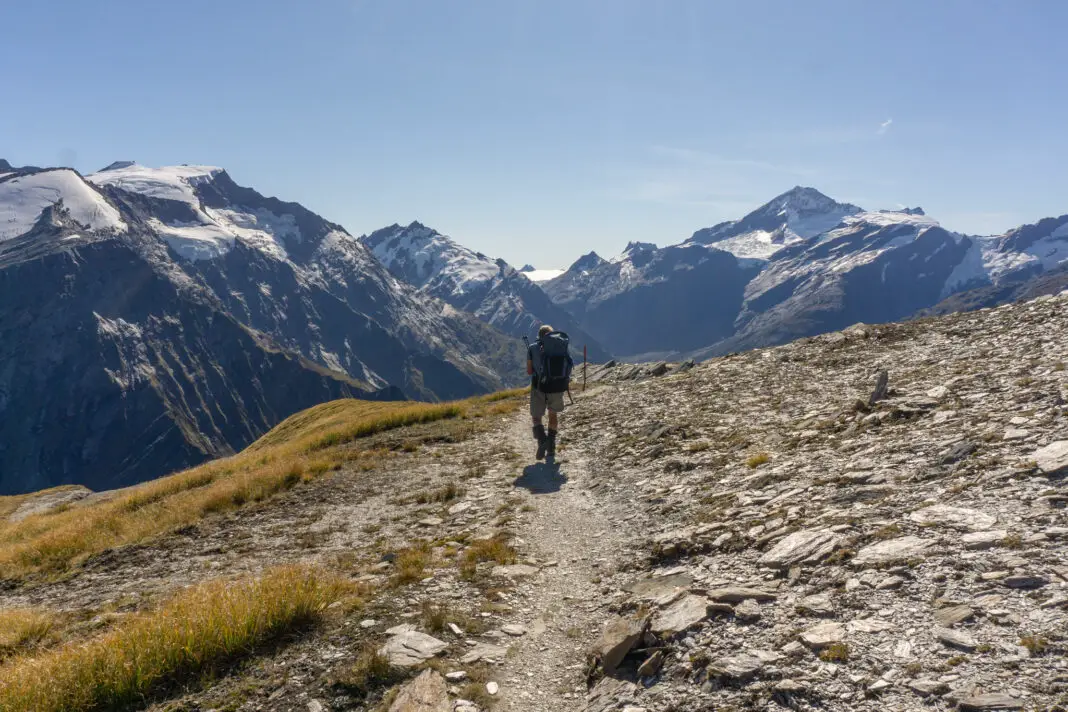
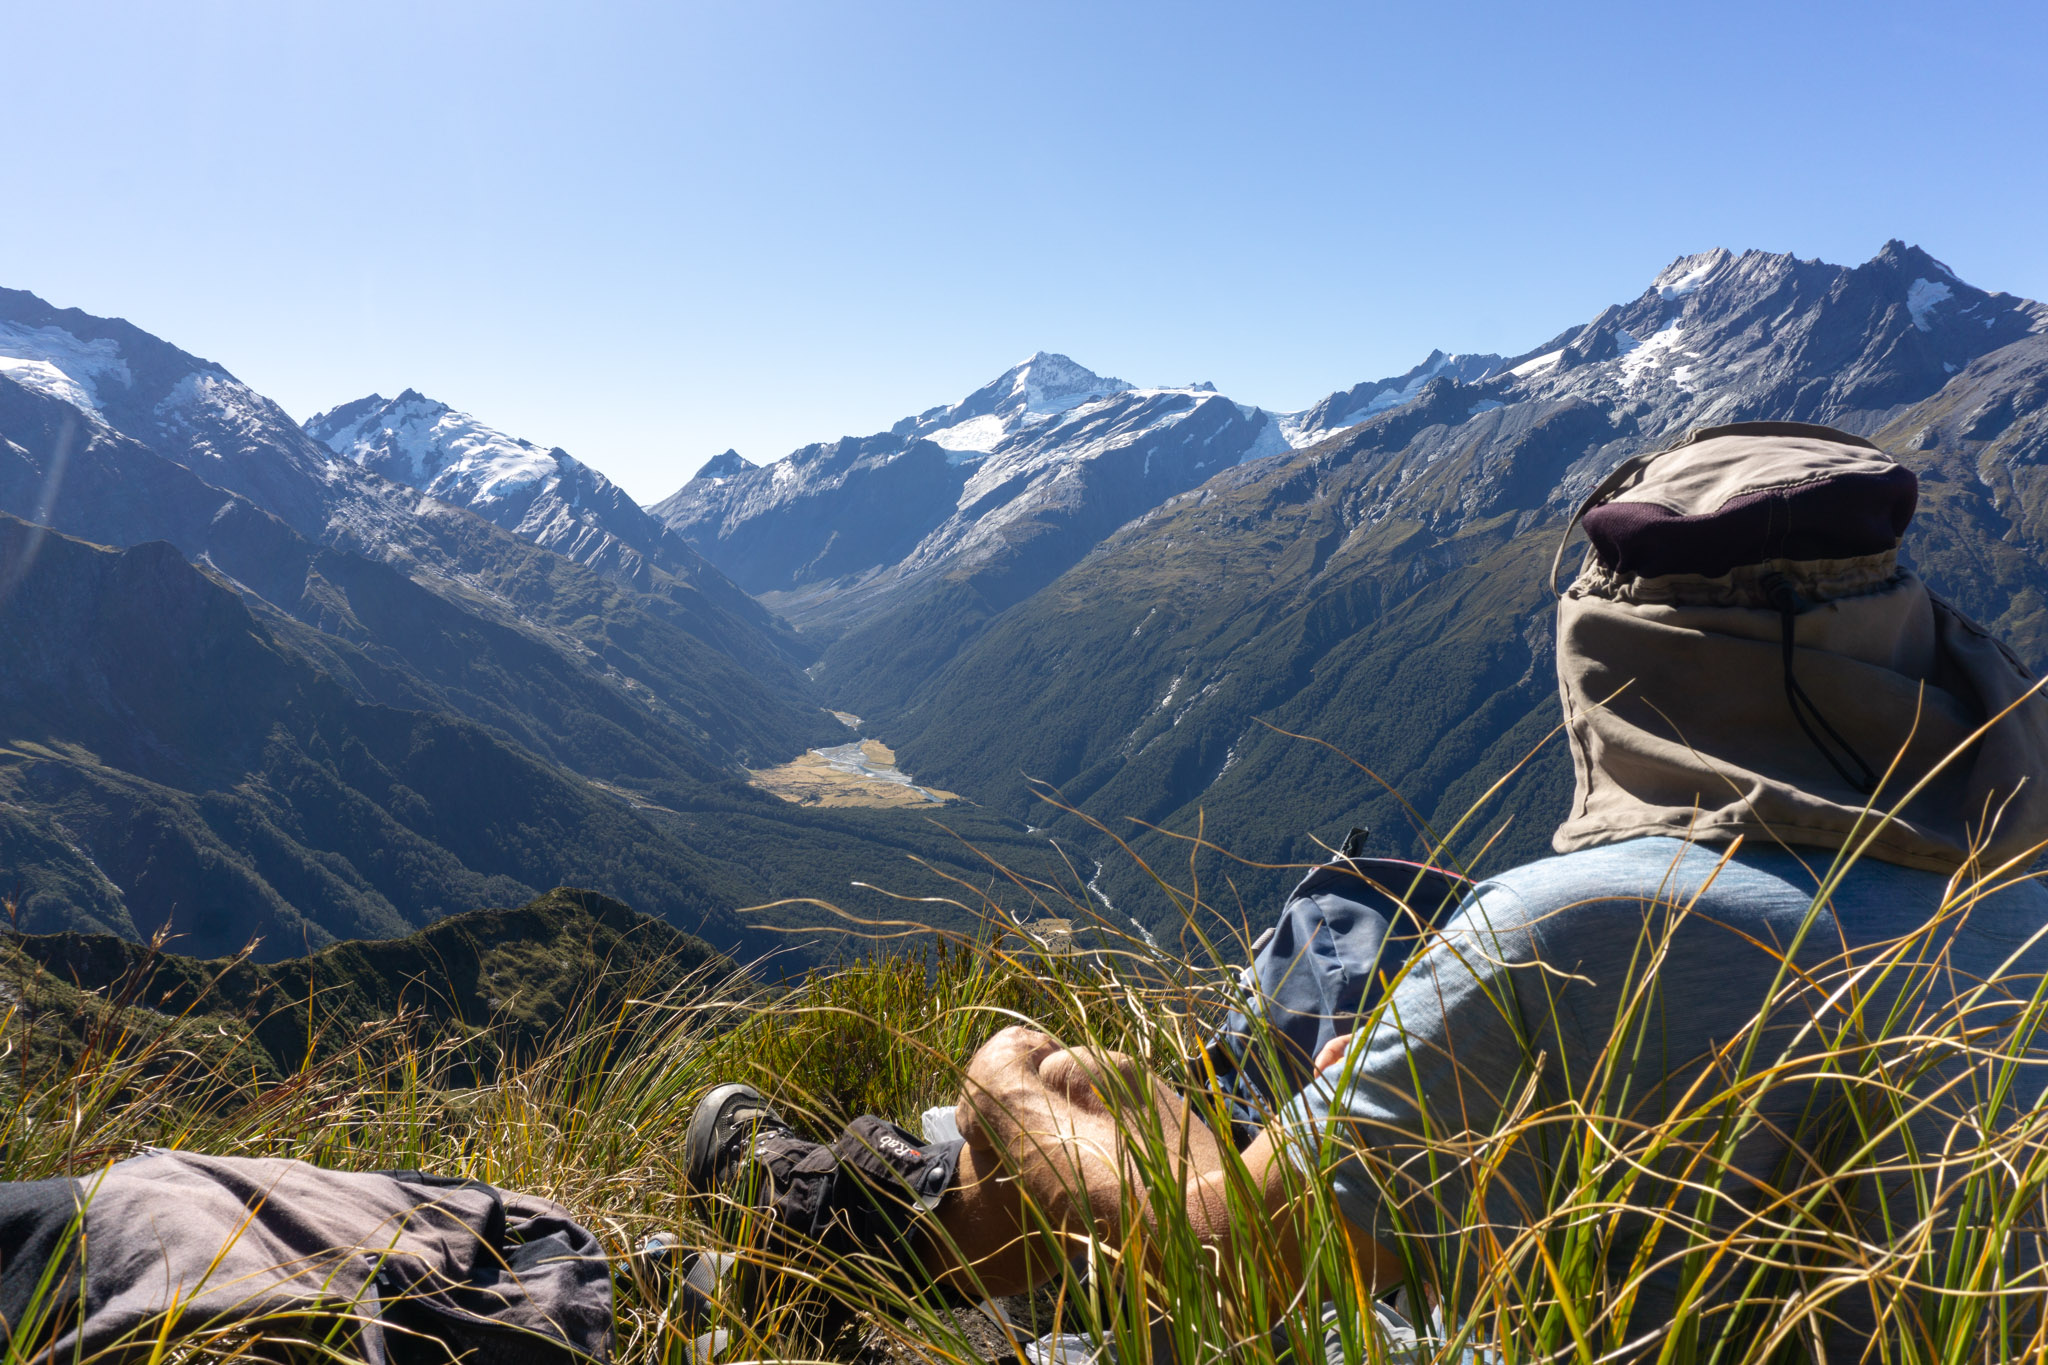
The lookout on the Cascade Saddle Route
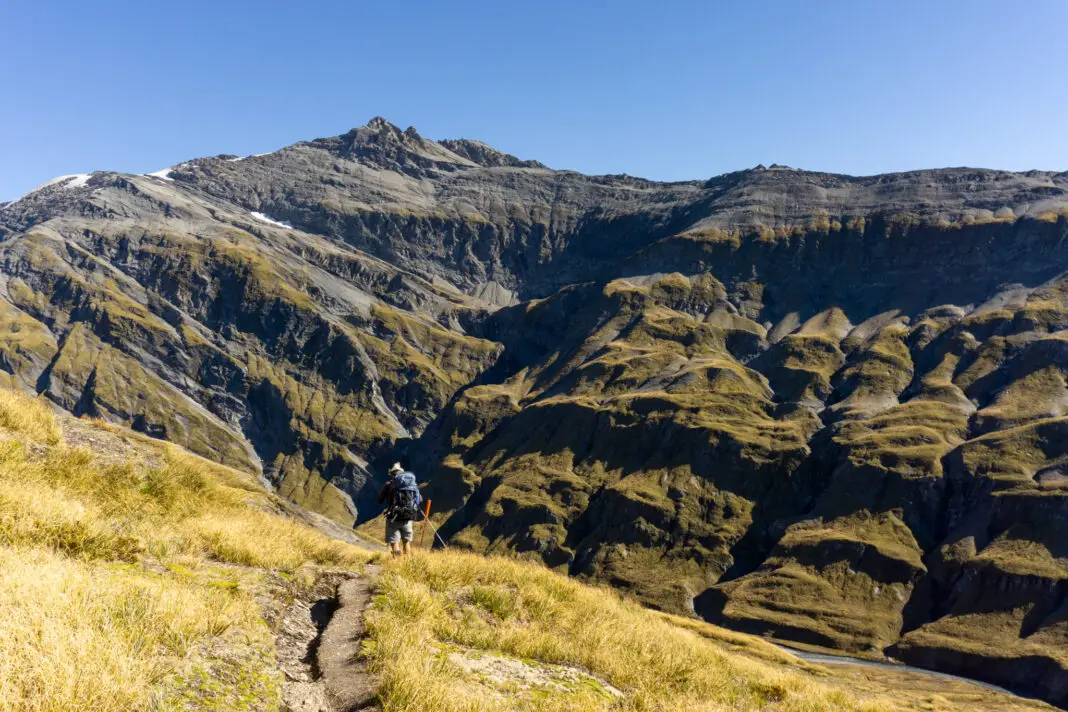
Just above the bush-line is a flat area with amazing 300 degree views of the Matukituki Valley and Tititea / Mt Aspiring. This lookout is the perfect place to reassess and make sure you (and everyone in your group) is happy continuing up. My dad and I had another break, eating chocolate and looking up at the ridge above us, trying to figure out where the hell the route went.
We’d already climbed about 700m vertical at this point, which wasn’t a bad effort! But Cascade Saddle likes to torture the legs; so we were only just over halfway and had another (steeper) 600m to go. Lucky us. I stuffed my face with chocolate, hoping for some endorphins, a sugar high, an epiphany. Anything to get me through what was coming.
This was the section of the track I’d been anxious about. But I was with my dad, an experienced tramper, and we’d picked picture perfect weather. There wasn’t even a breeze, and I was suddenly happy for the frosty start and cool autumn air. In summer this part of the track would be completely exposed to the sun – you’d want a very early start to avoid the heat of the day. There wouldn’t be any ice or snow above us.
I just had to put one foot in front of the other.
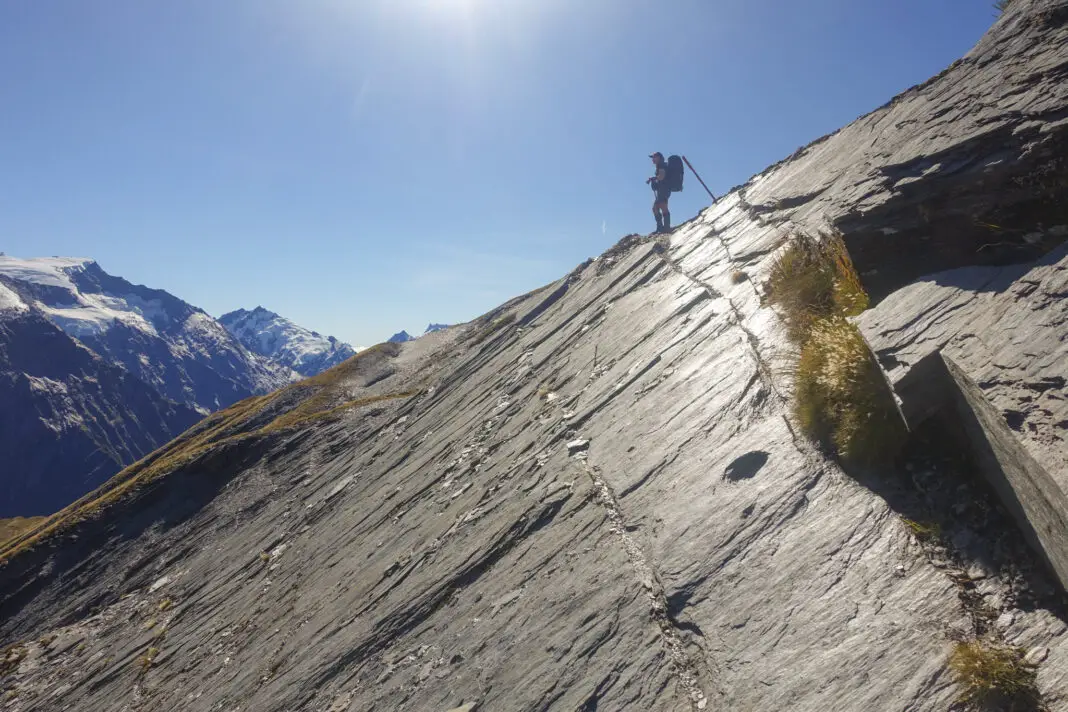
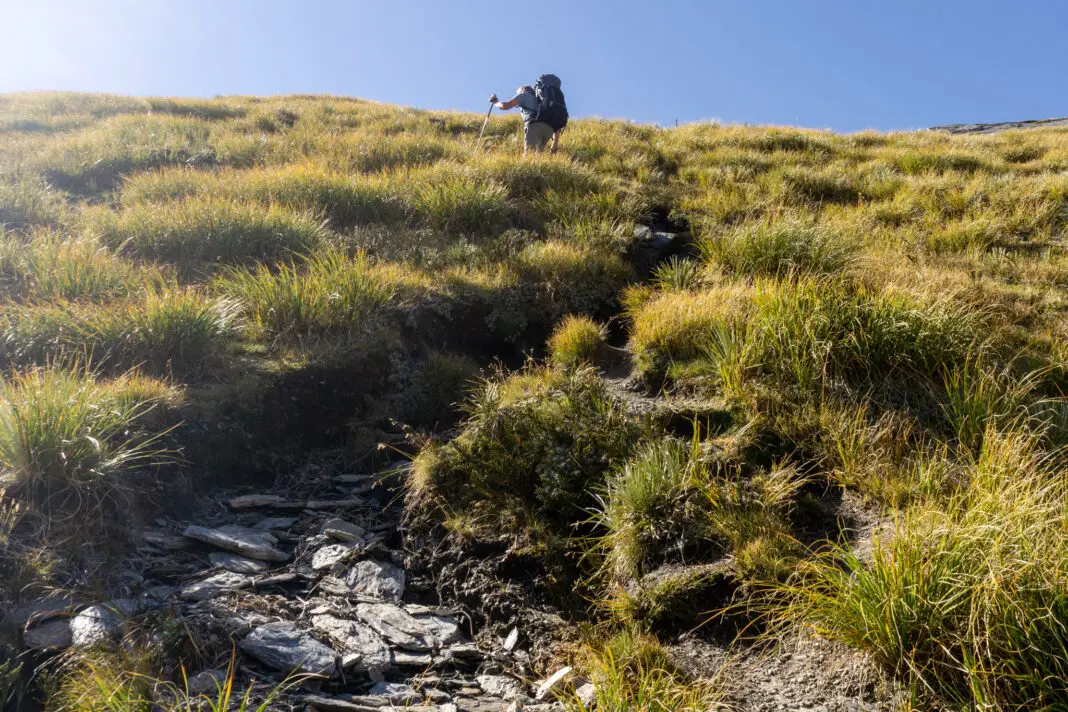
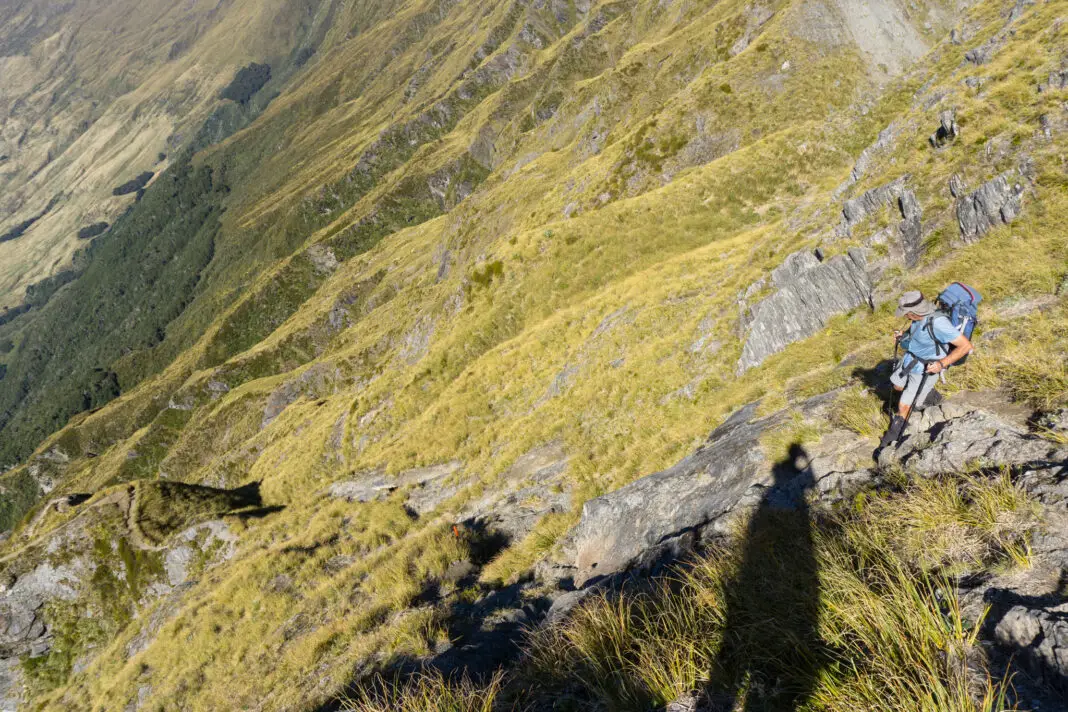
Above the bush-line: the steepest part of Cascade Saddle Route
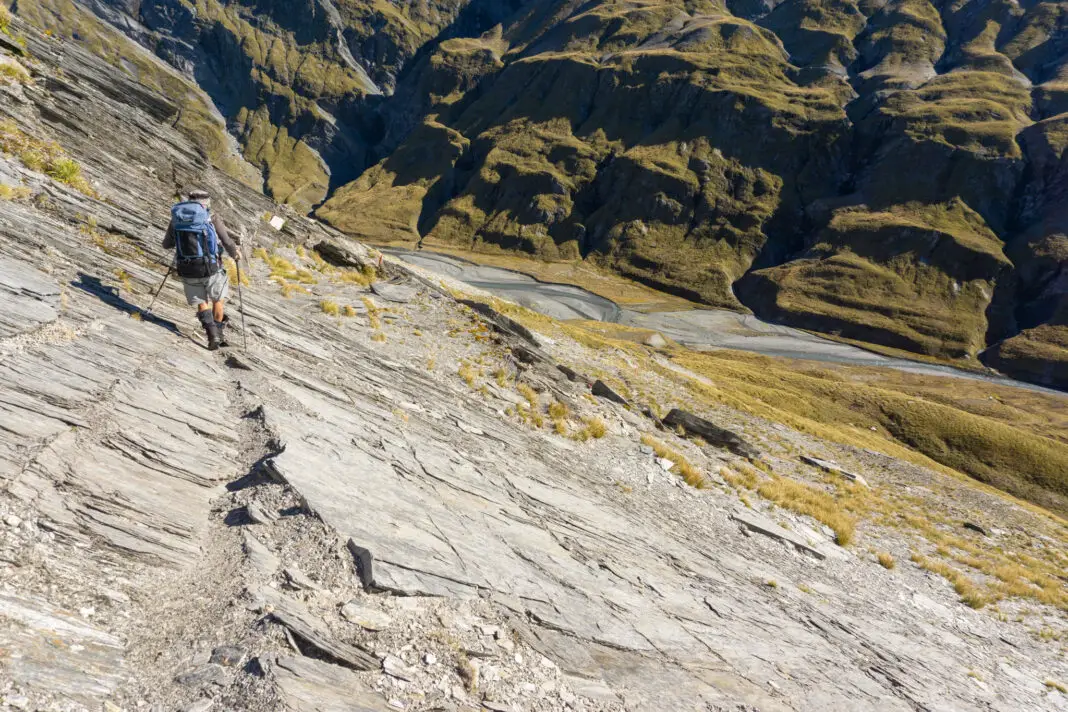
It was steep.
The photos don’t really do it justice, but they give you some idea of how much climbing was involved.
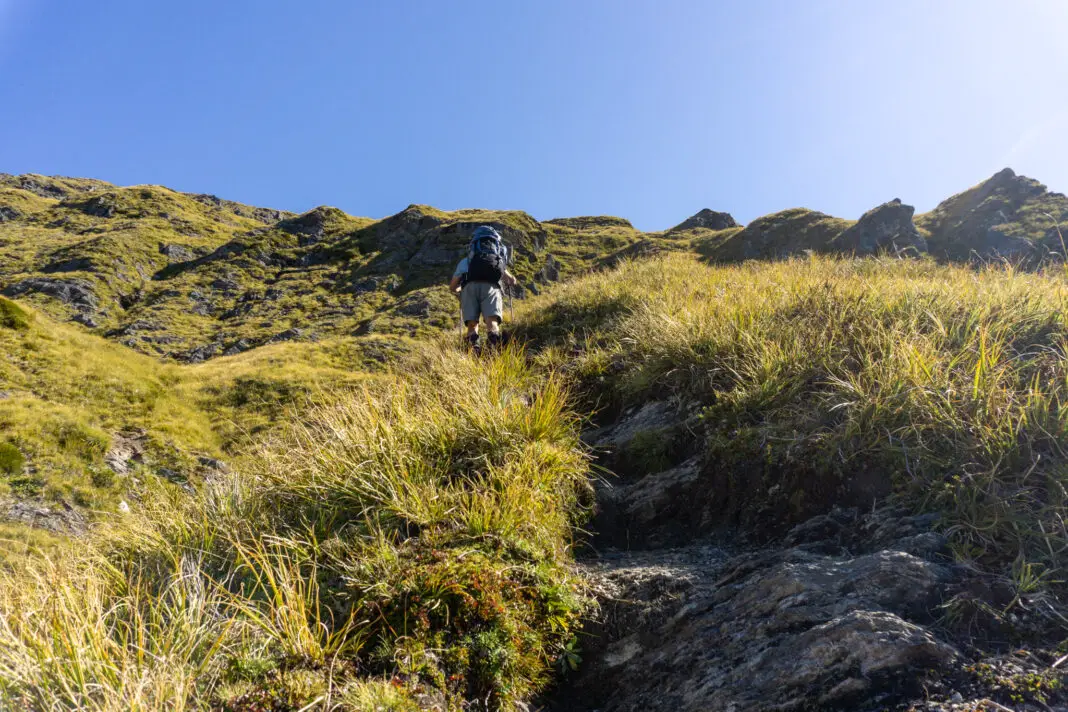
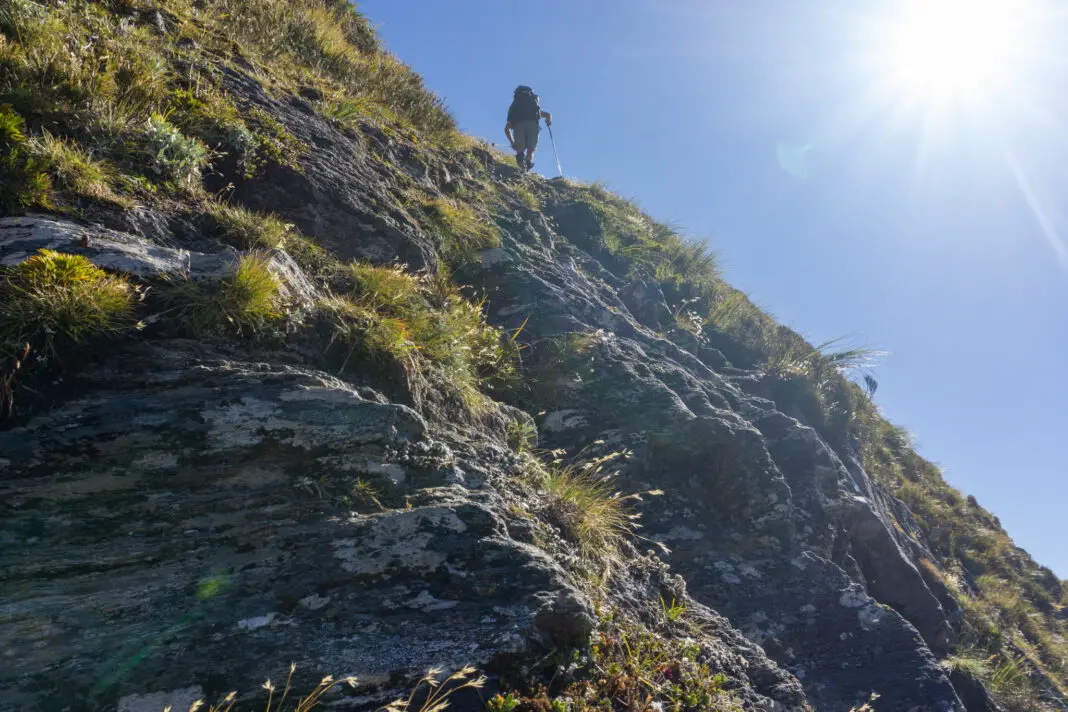
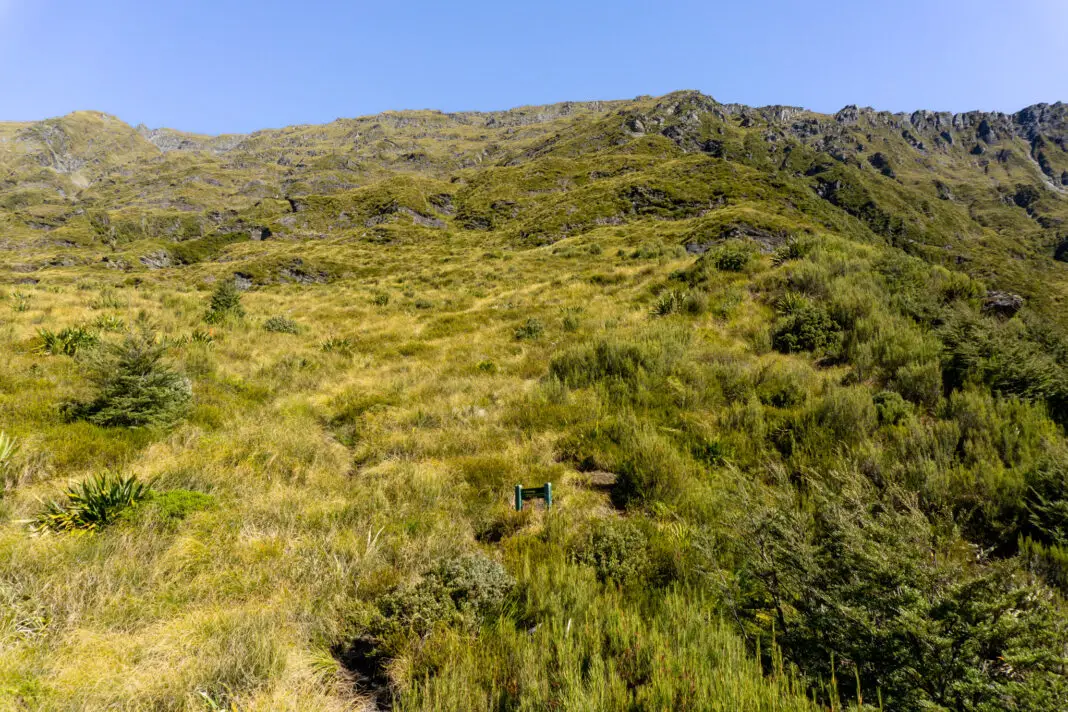
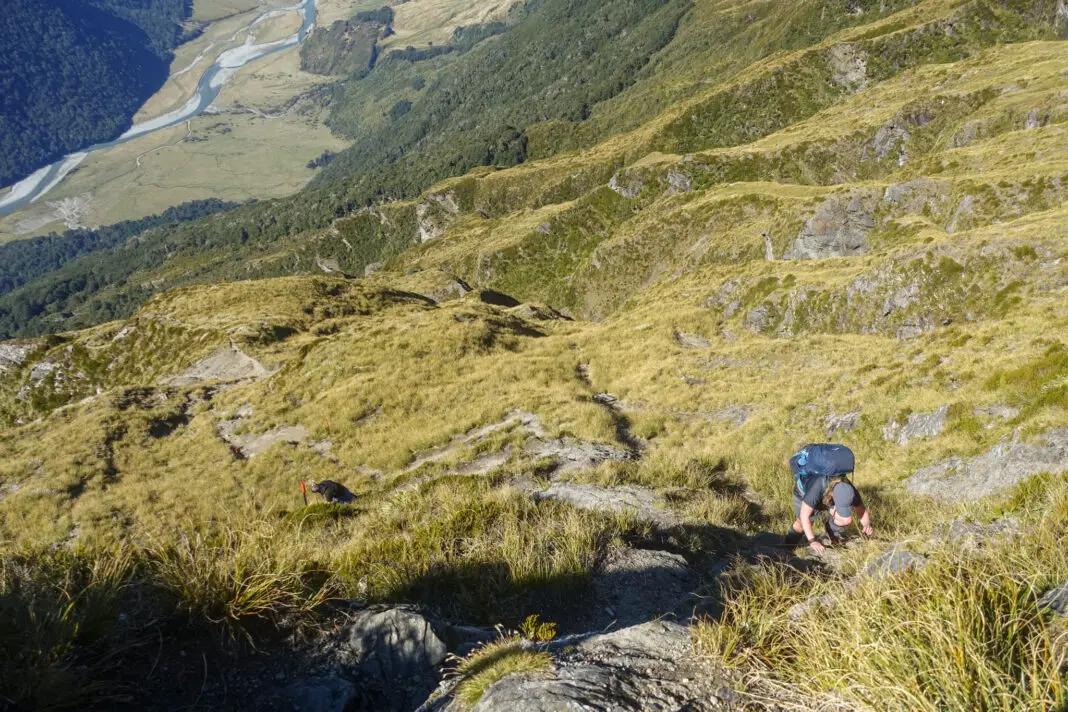
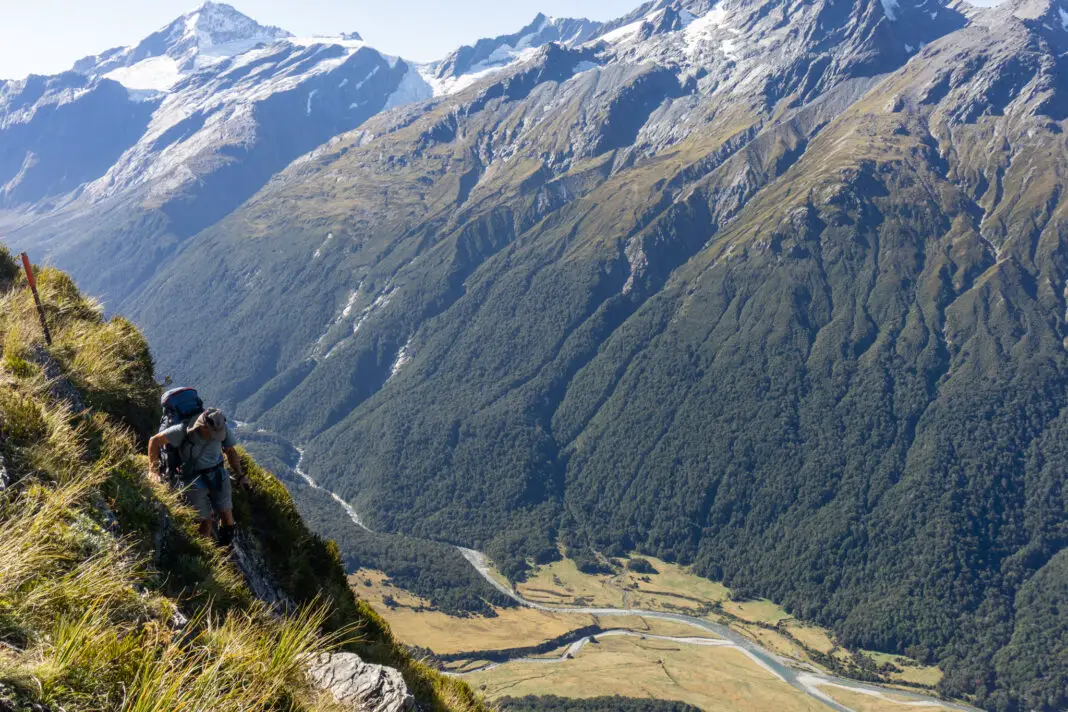
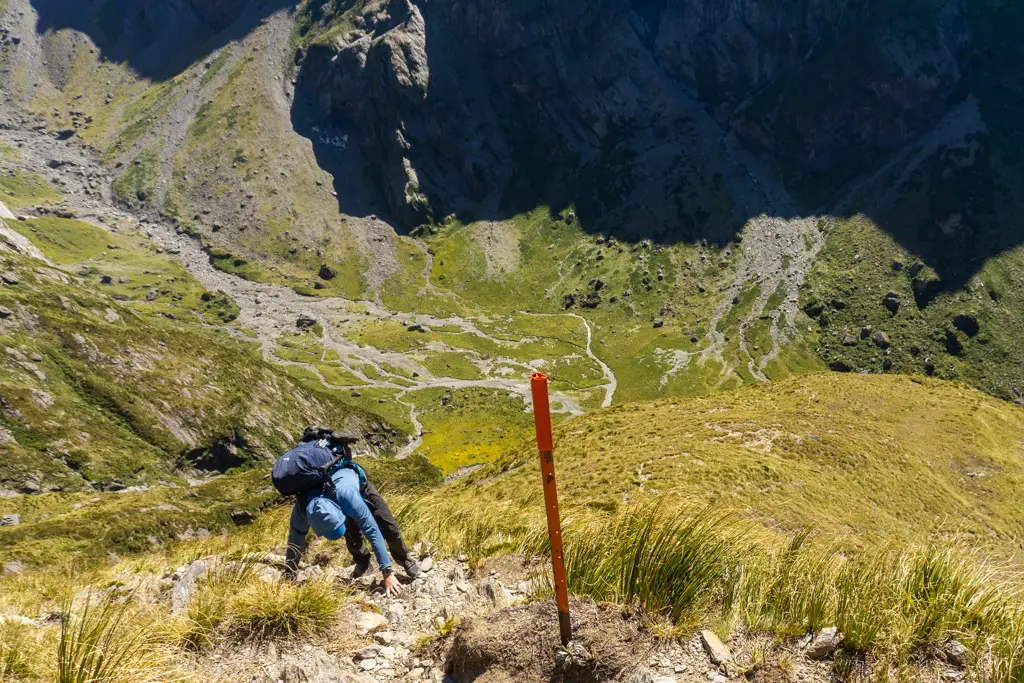
The route above the bush-line started with a steep climb through high tussocks. Then it quickly turned into climbing up and around small bluffs as we got higher and the tussocks shrank. The rock was grippy (in sunny weather) with (mostly) obvious places to step. It was extremely steep, but there wasn’t anywhere so far where I felt uncomfortable. (Although I definitely felt that parts of the route were more rock climbing than tramping). If you fell, you would definitely hurt yourself, but it wasn’t the sheer drop-offs down to the valley that I had been expecting.
Those were yet to come.
If you want to check out some of the videos I took on these parts, head over to my Instagram where I’ve saved a story highlight on Cascade Saddle. I think video captures the steepness slightly better than photos.
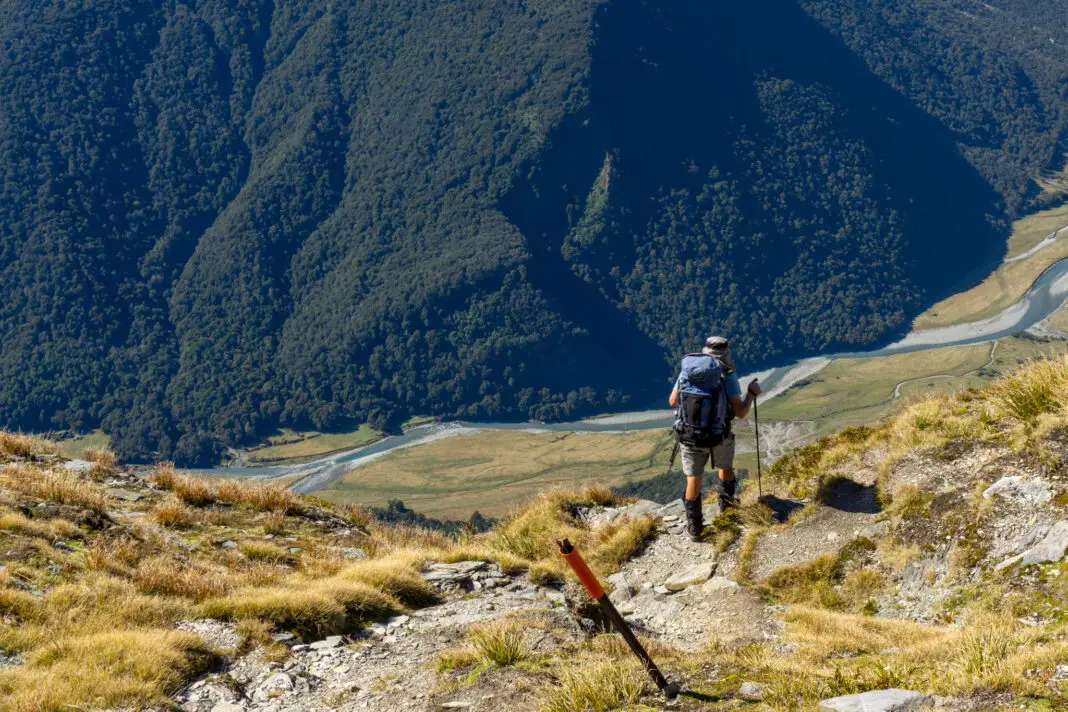
The track only got steeper, with a particularly gnarly bit right before and after the famous photo spot. We stopped here for another breather, soaking in the amazing views that we couldn’t really see when concentrating on our footing.
This is another chance to re-assess – are you feeling comfortable with what you’ve done so far? Because believe it or not it get slightly steeper from here, with much higher consequences for failing.
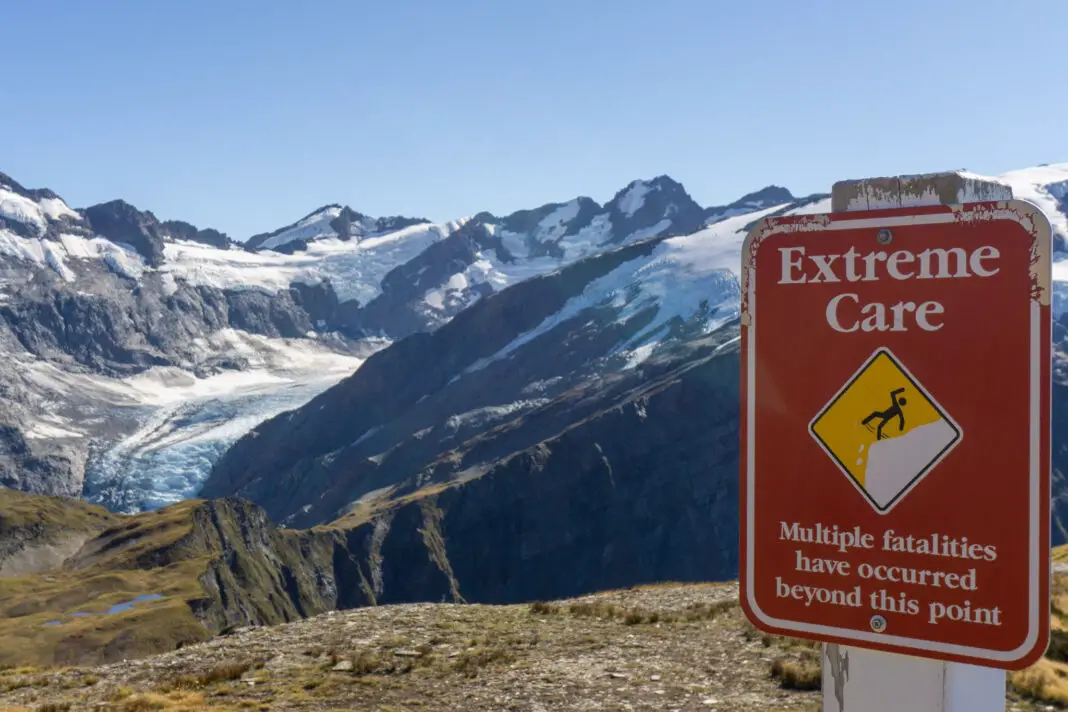
Almost there
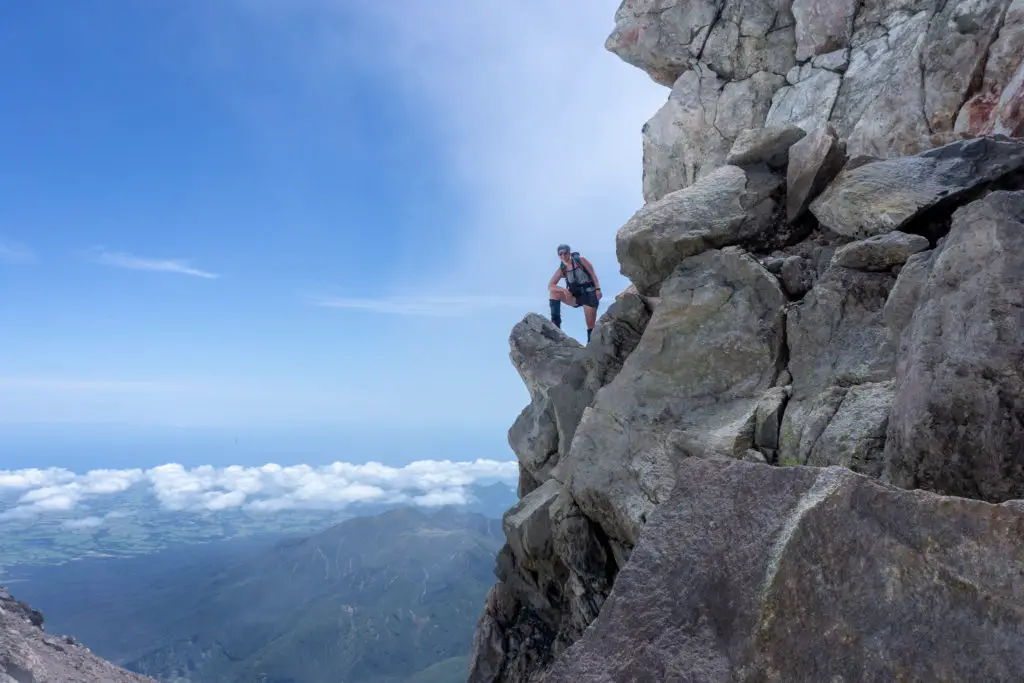
After more climbing (and by climbing, I mean climbing, not just walking uphill), we reached another ominous sign warning of fatalities that have occurred in this spot. Dad knew some of the people involved in the last rescue / body recovery from this area. I took it slowly and carefully, conscious of the weight of my overnight pack on my back trying to pull me off balance.
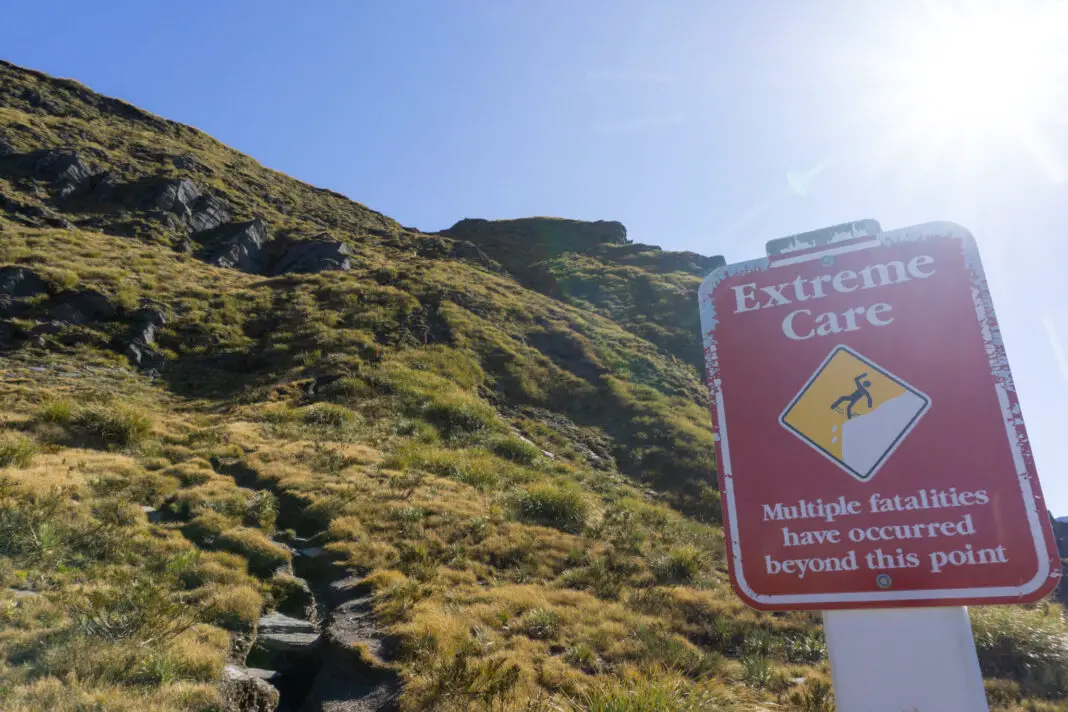
This section isn’t any steeper than others parts of the route, but the consequences of falling (down in to a steep gully towards the valley floor far below) are higher. But happily this steep section is the last before the Pylon at the highest part of the route, and with dry, warm conditions it was fine to climb up.
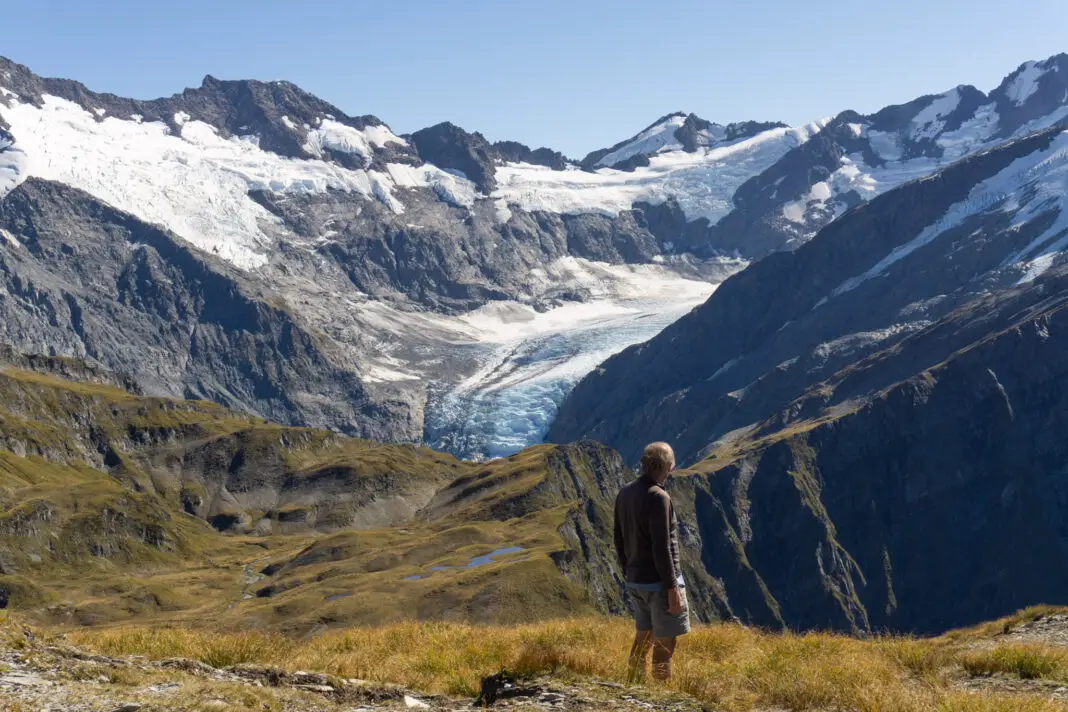
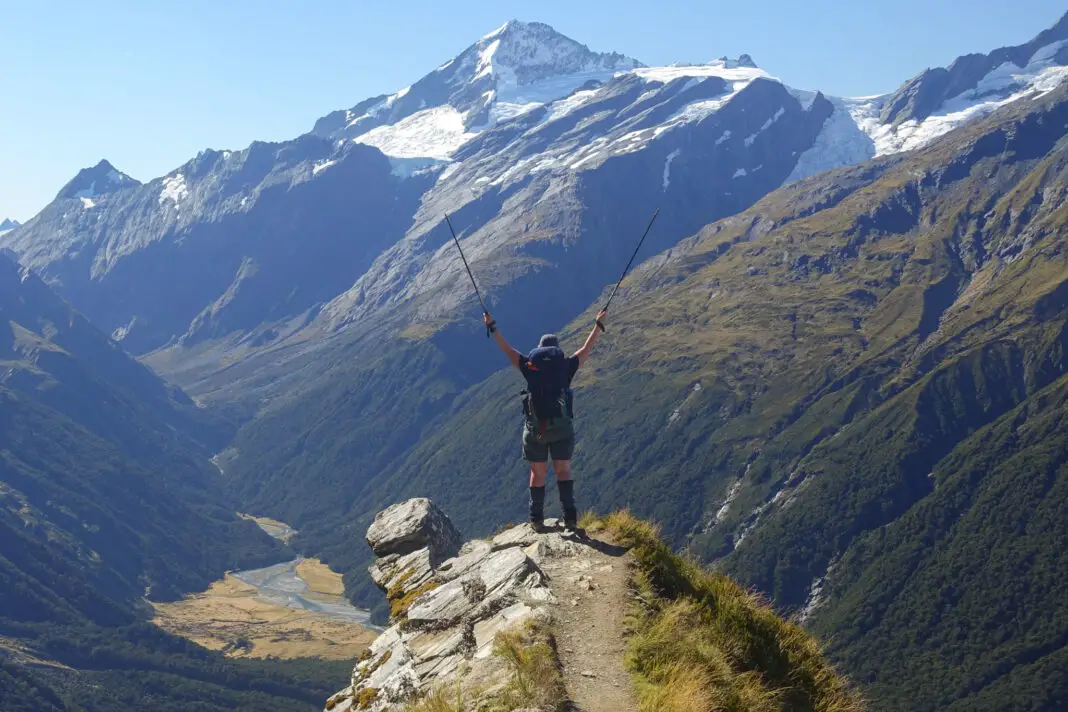
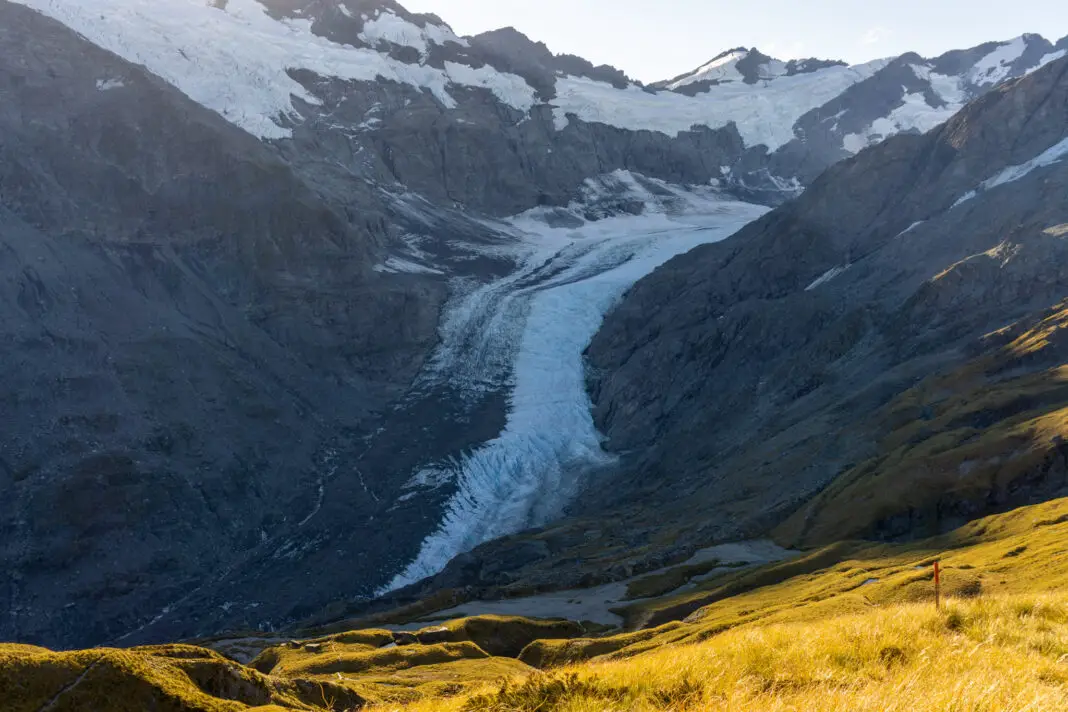
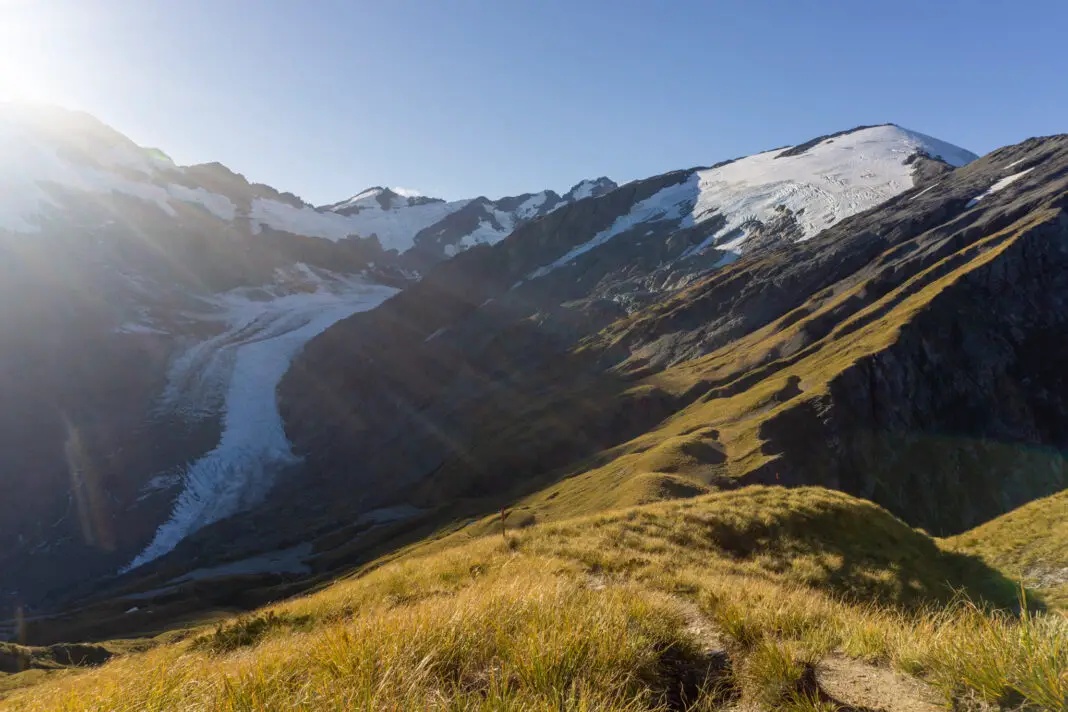
The Pylon
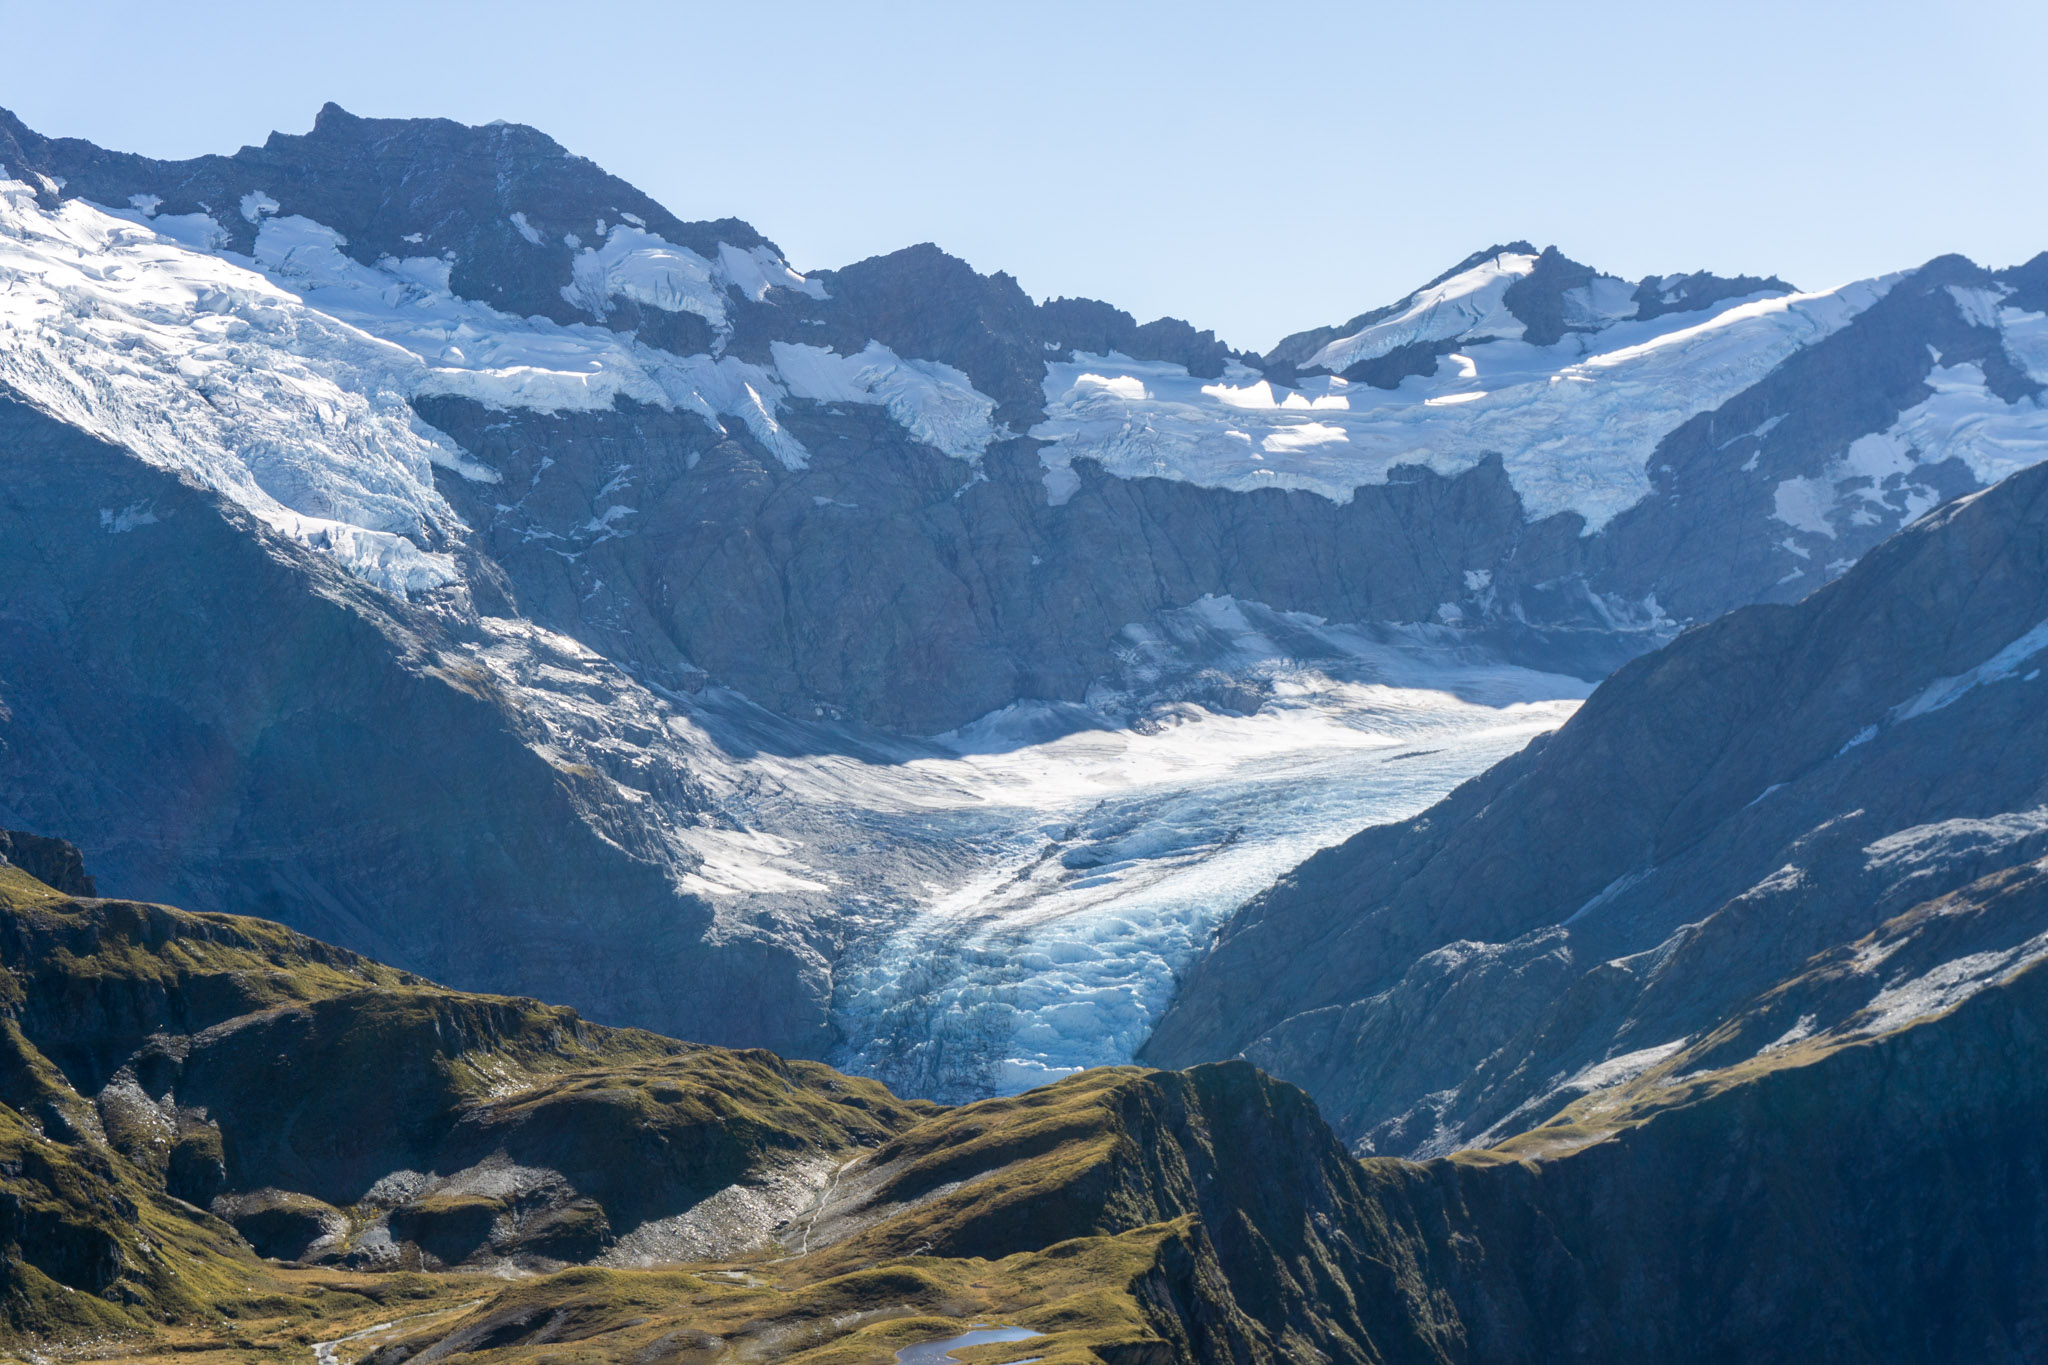
It was a relief to finally reach the “pylon” (a collection of rusty metal that looked like it wouldn’t last another season upright), which marks the highest point of the Cascade Saddle Route. From here we could look across at our first views of Cascade Saddle and the Dart Glacier. Absolutely amazing!
We’d only come across three other people since we left Aspiring Hut, all descending (and one of whom I later realised I “knew” from Instagram, Mike). From here on out we wouldn’t see anyone until heading back down the next day; we’d have Casade Saddle to ourselves (and the kea).

It had taken us about 5.5 hours total from Aspiring Hut (including breaks) to reach the Pylon (or 4 hours minus breaks). But we still had a 300m drop to our campsite for the night at Cascade Stream. And Cascade Saddle itself was still almost two kilometres away as the kea flies.
Our tramping was not yet over.
Descent from the Pylon
The climb from the Pylon down to Cascade Stream was steep, but only took 30 minutes. There was a sketchy looking bit across some rock slabs, but it looked worse than it was, and DOC had drilled a very handy foot-hold into it as precisely the right point.
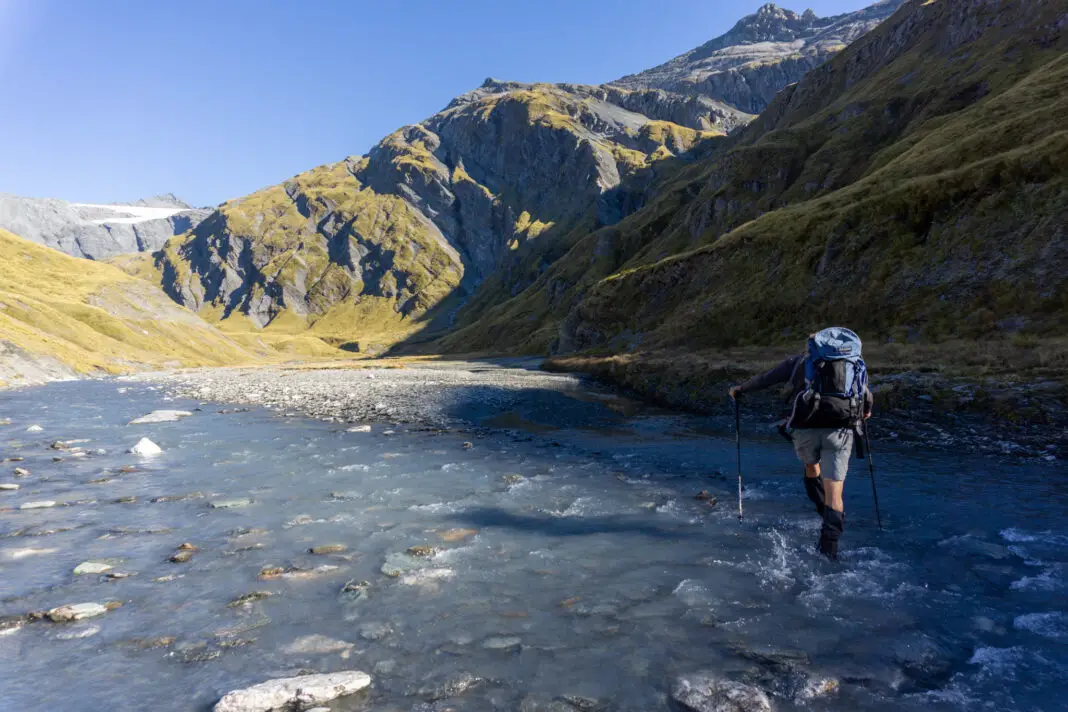
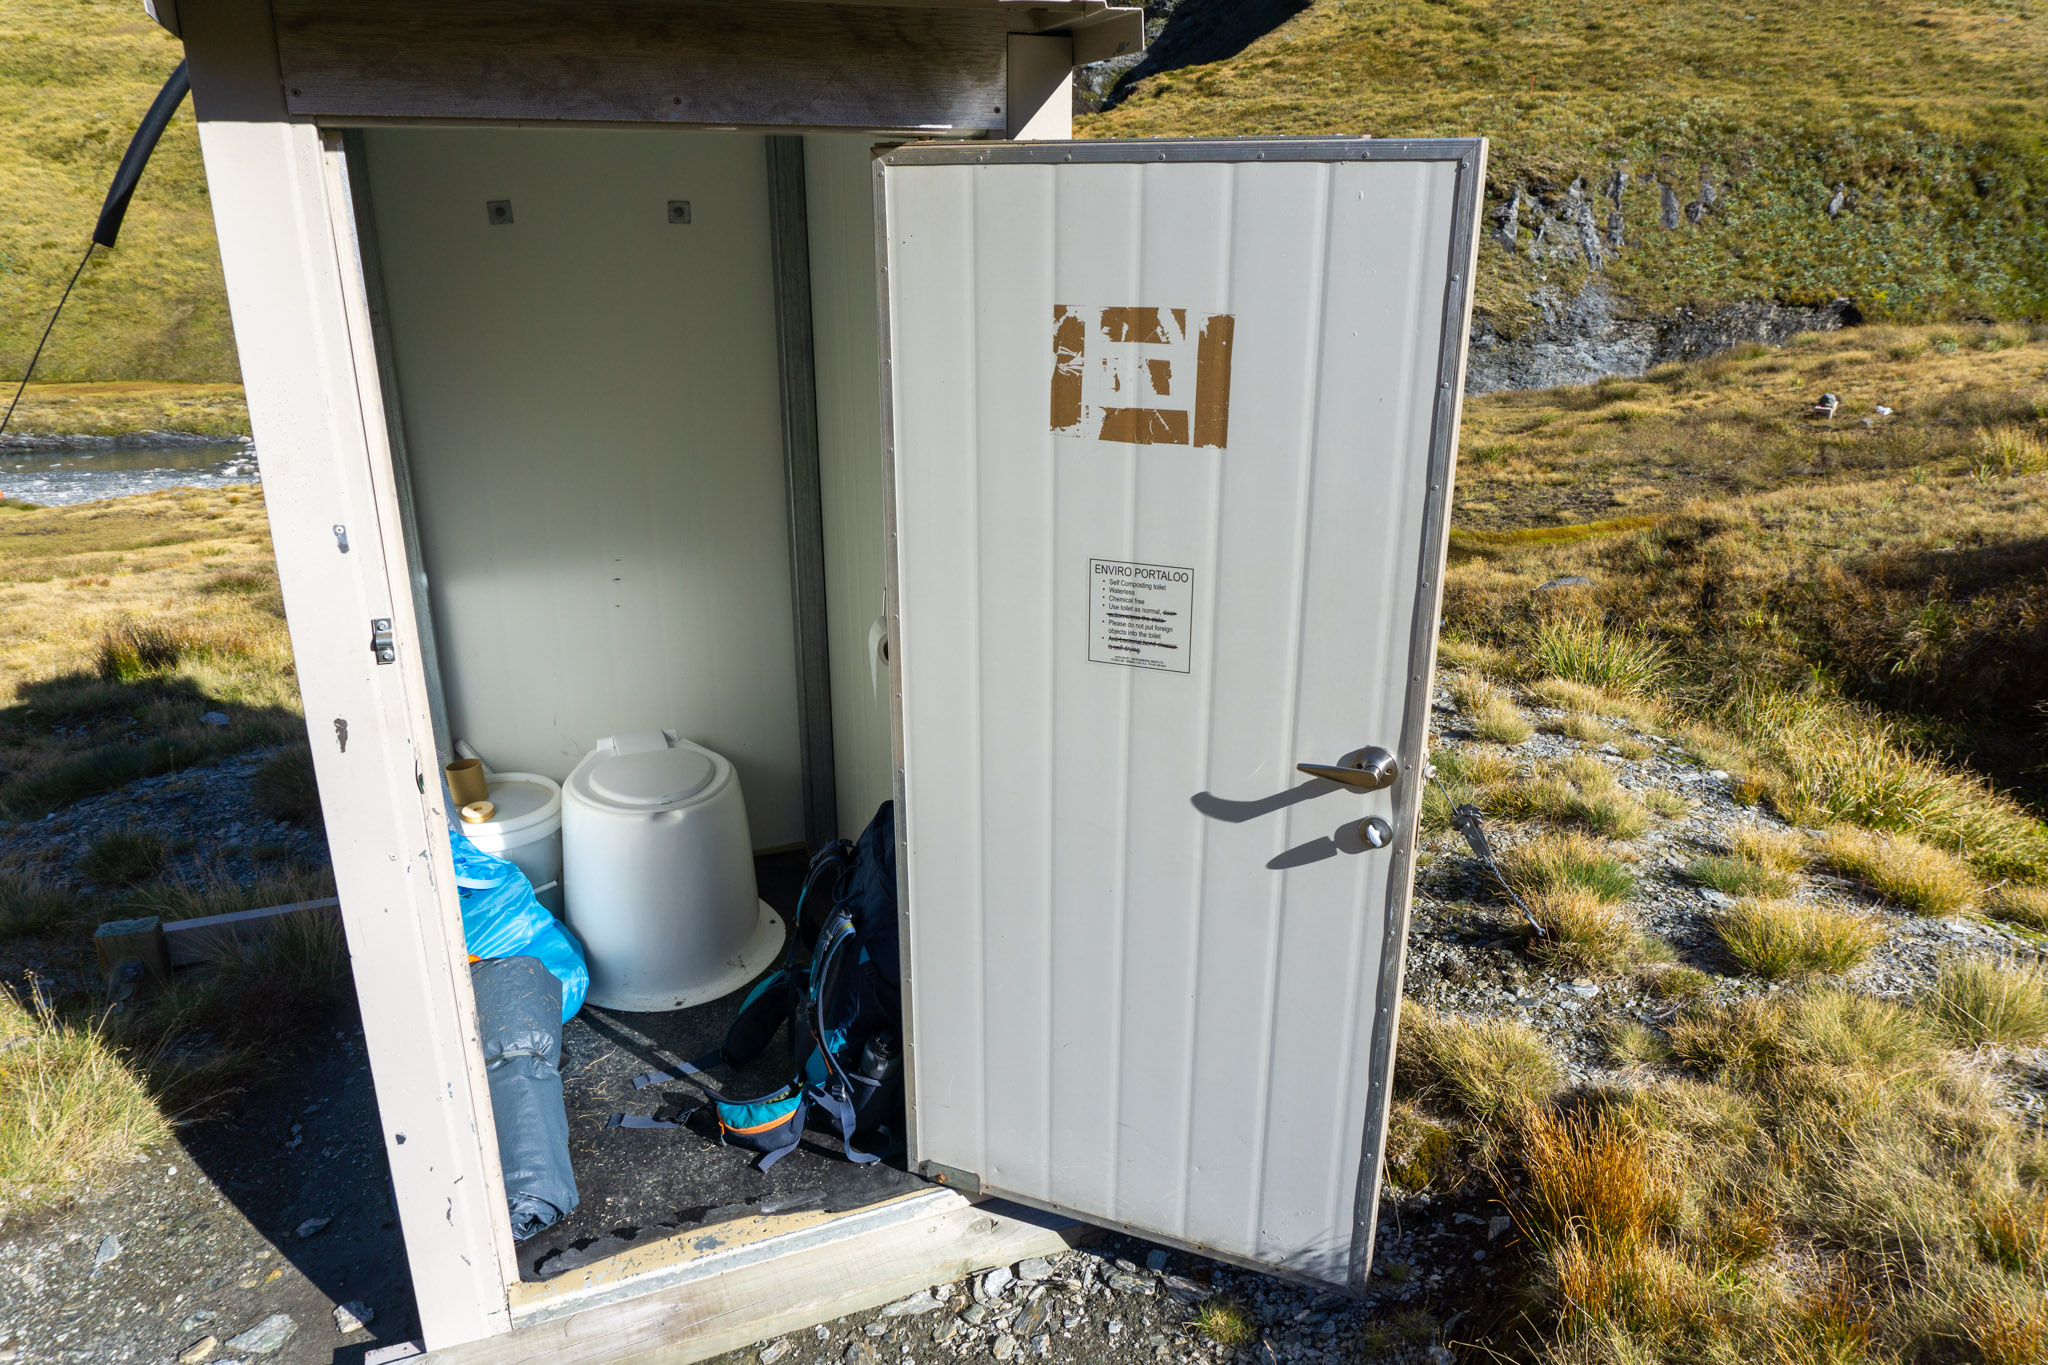
Before long the long-drop toilet marking the campsite came into view. We’d been worried the stream would be low with the drought we were experiencing, but it was still full of milky snow-melt even this late in the season.
I’d head numerous stories of the Cascade Saddle kea destroying tents and any belongings that were left out in the open. So instead of setting up our tent, we left a pack and extra gear in the toilet, with the door bolted closed. We crossed Cascade Stream without even getting our boots wet and headed off to Cascade Saddle.
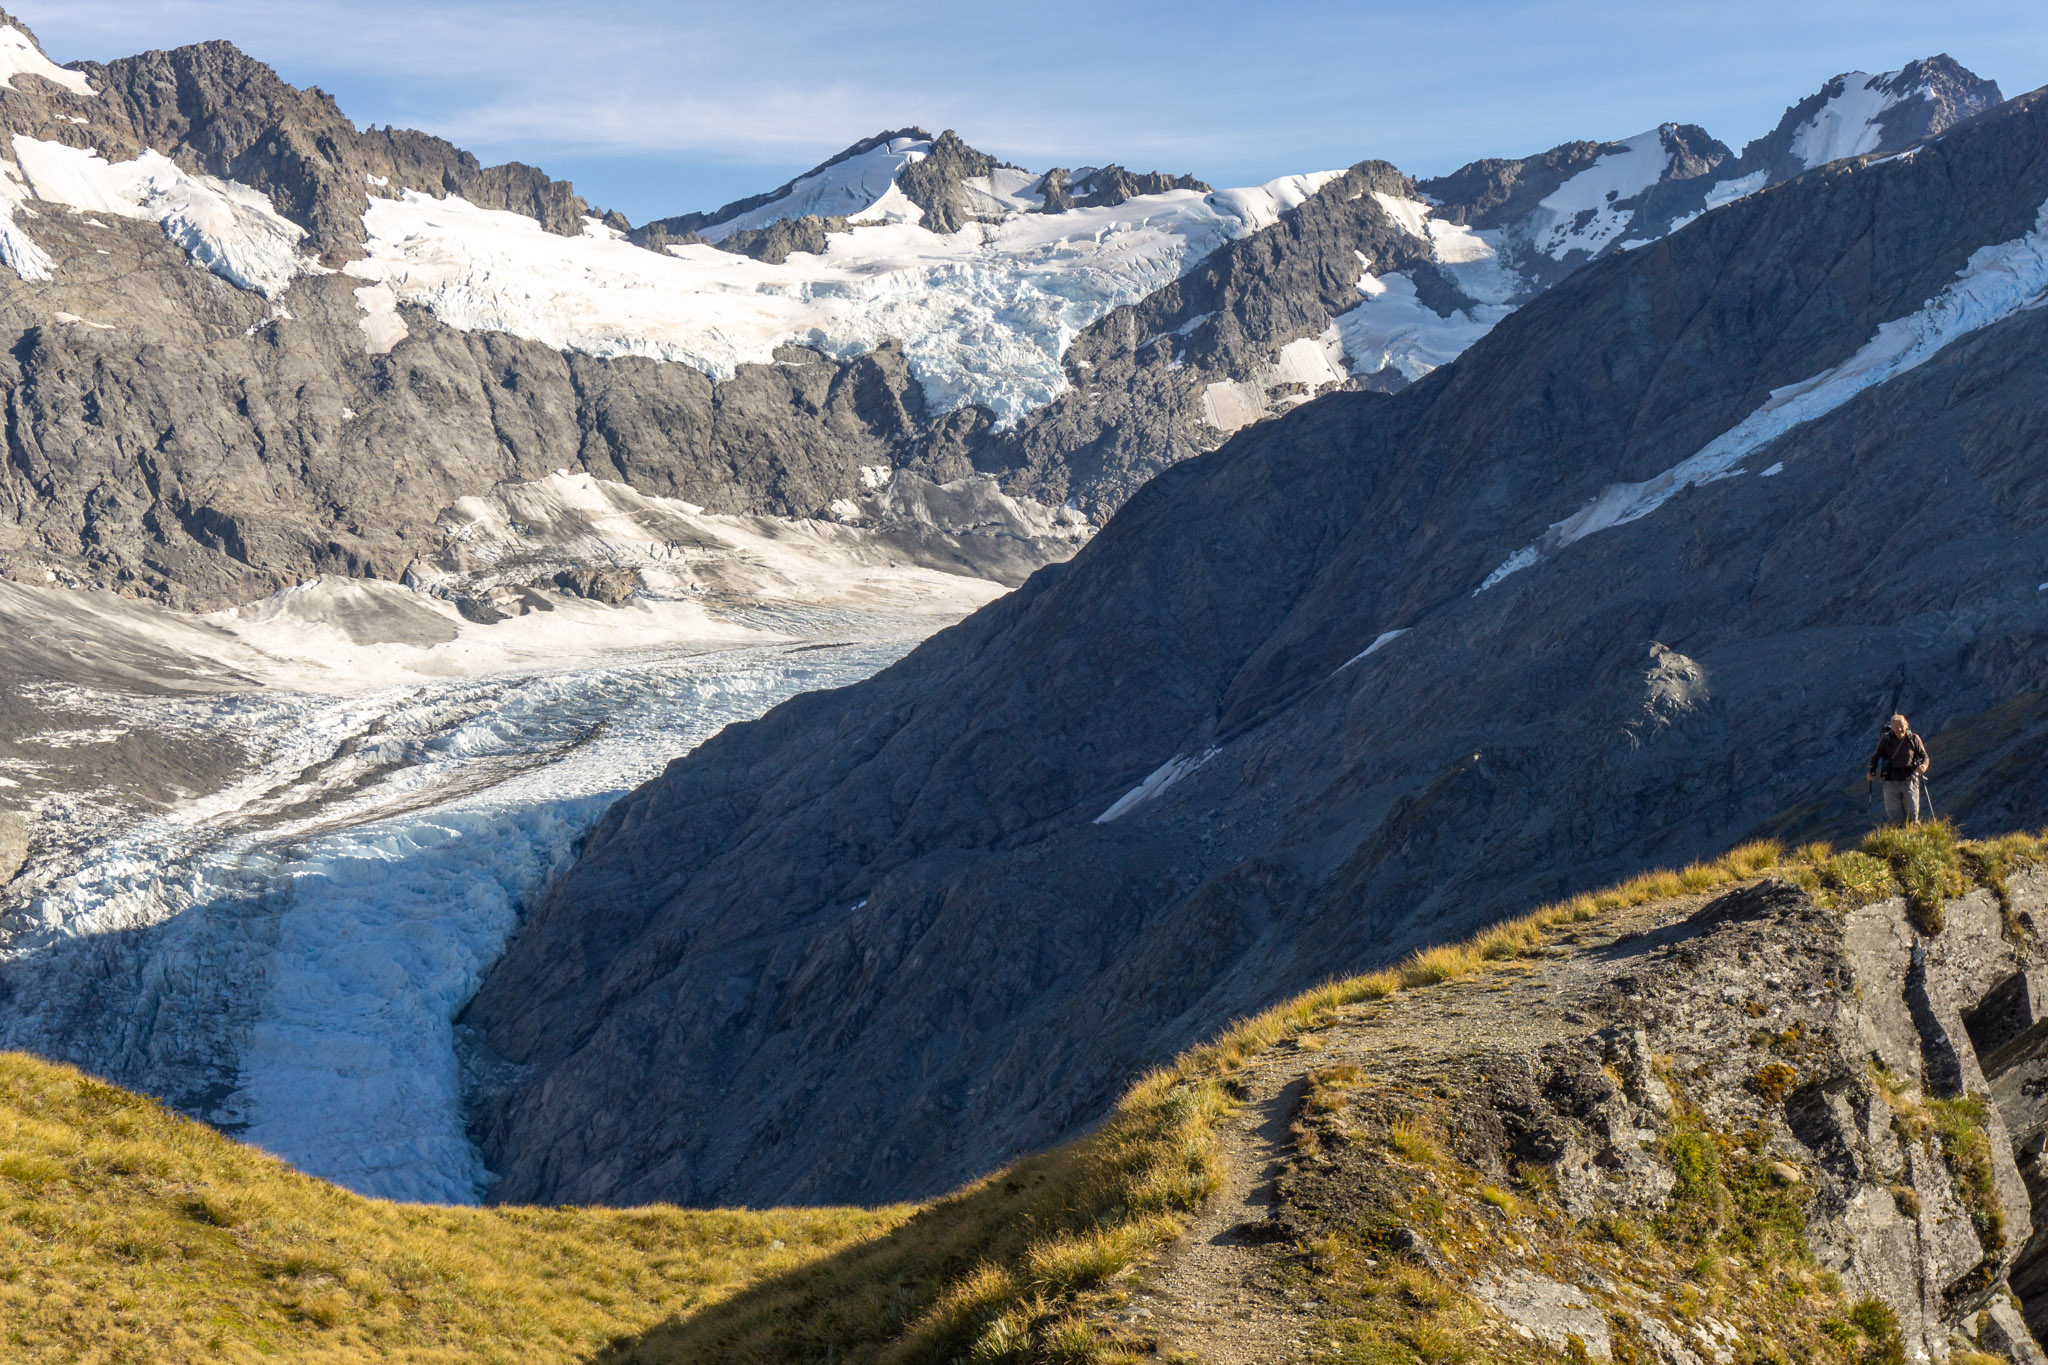
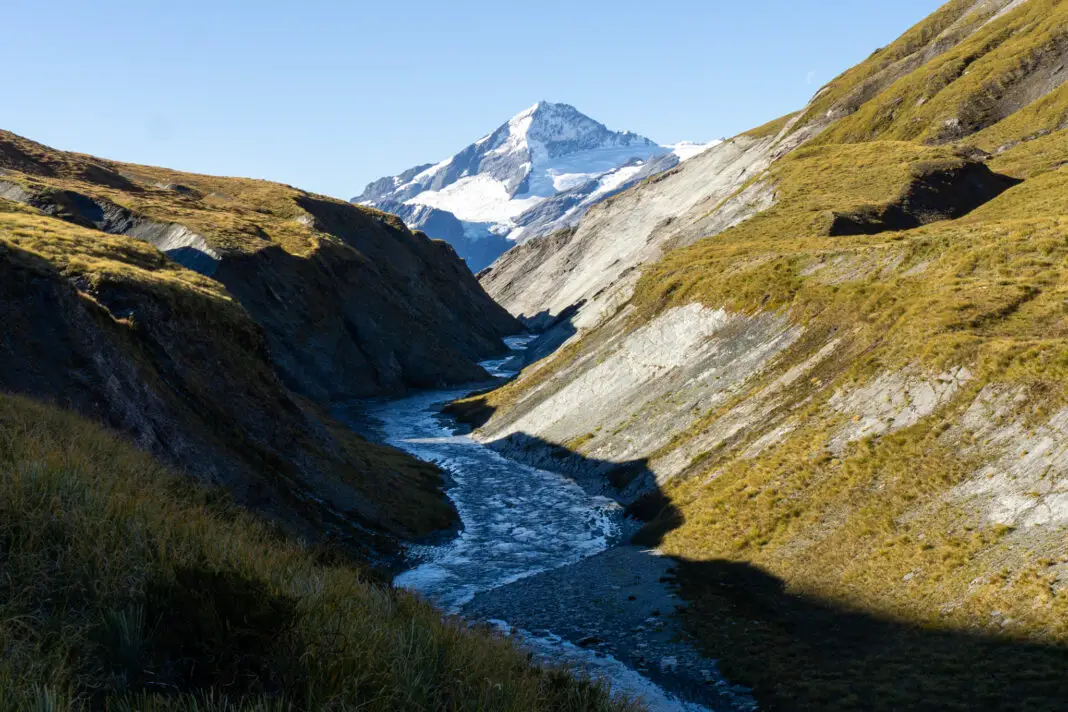
Reaching Cascade Saddle
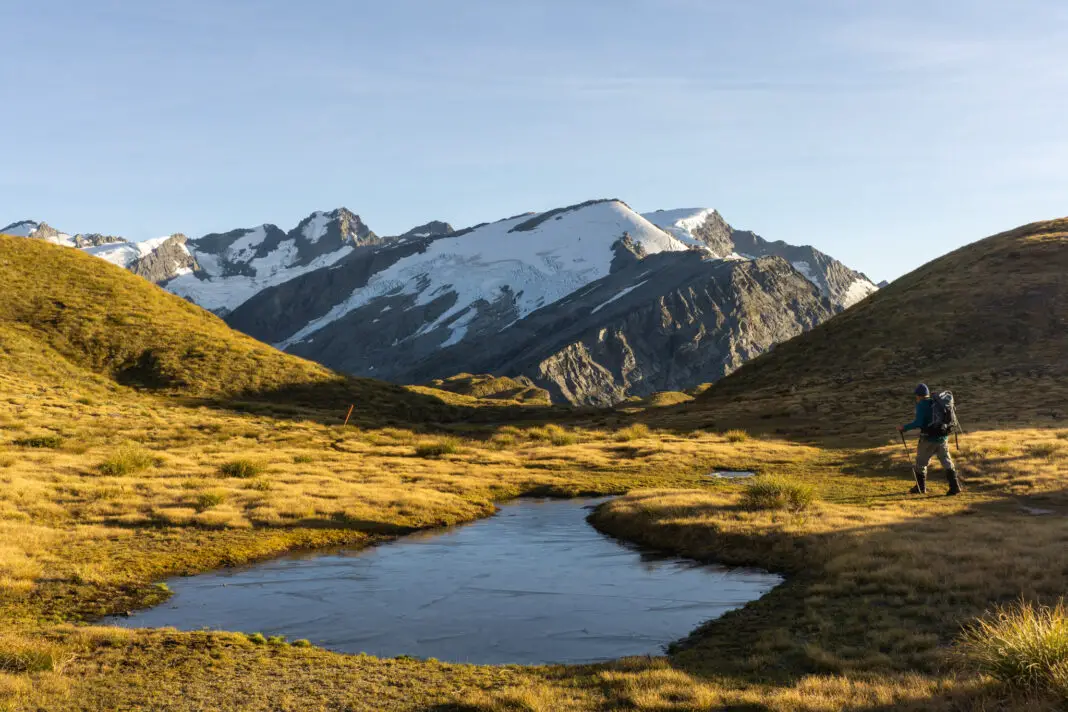
It took 45 minutes to reach the view of Cascade Saddle and the Dart Glacier. We walked through gorgeous alpine terraces and gorges on an obvious poled track, but didn’t go all the way down to Cascade Saddle itself (we felt we’d already done enough elevation gain by this stage!). The photos will do it more justice than my words ever could. It was pretty special.
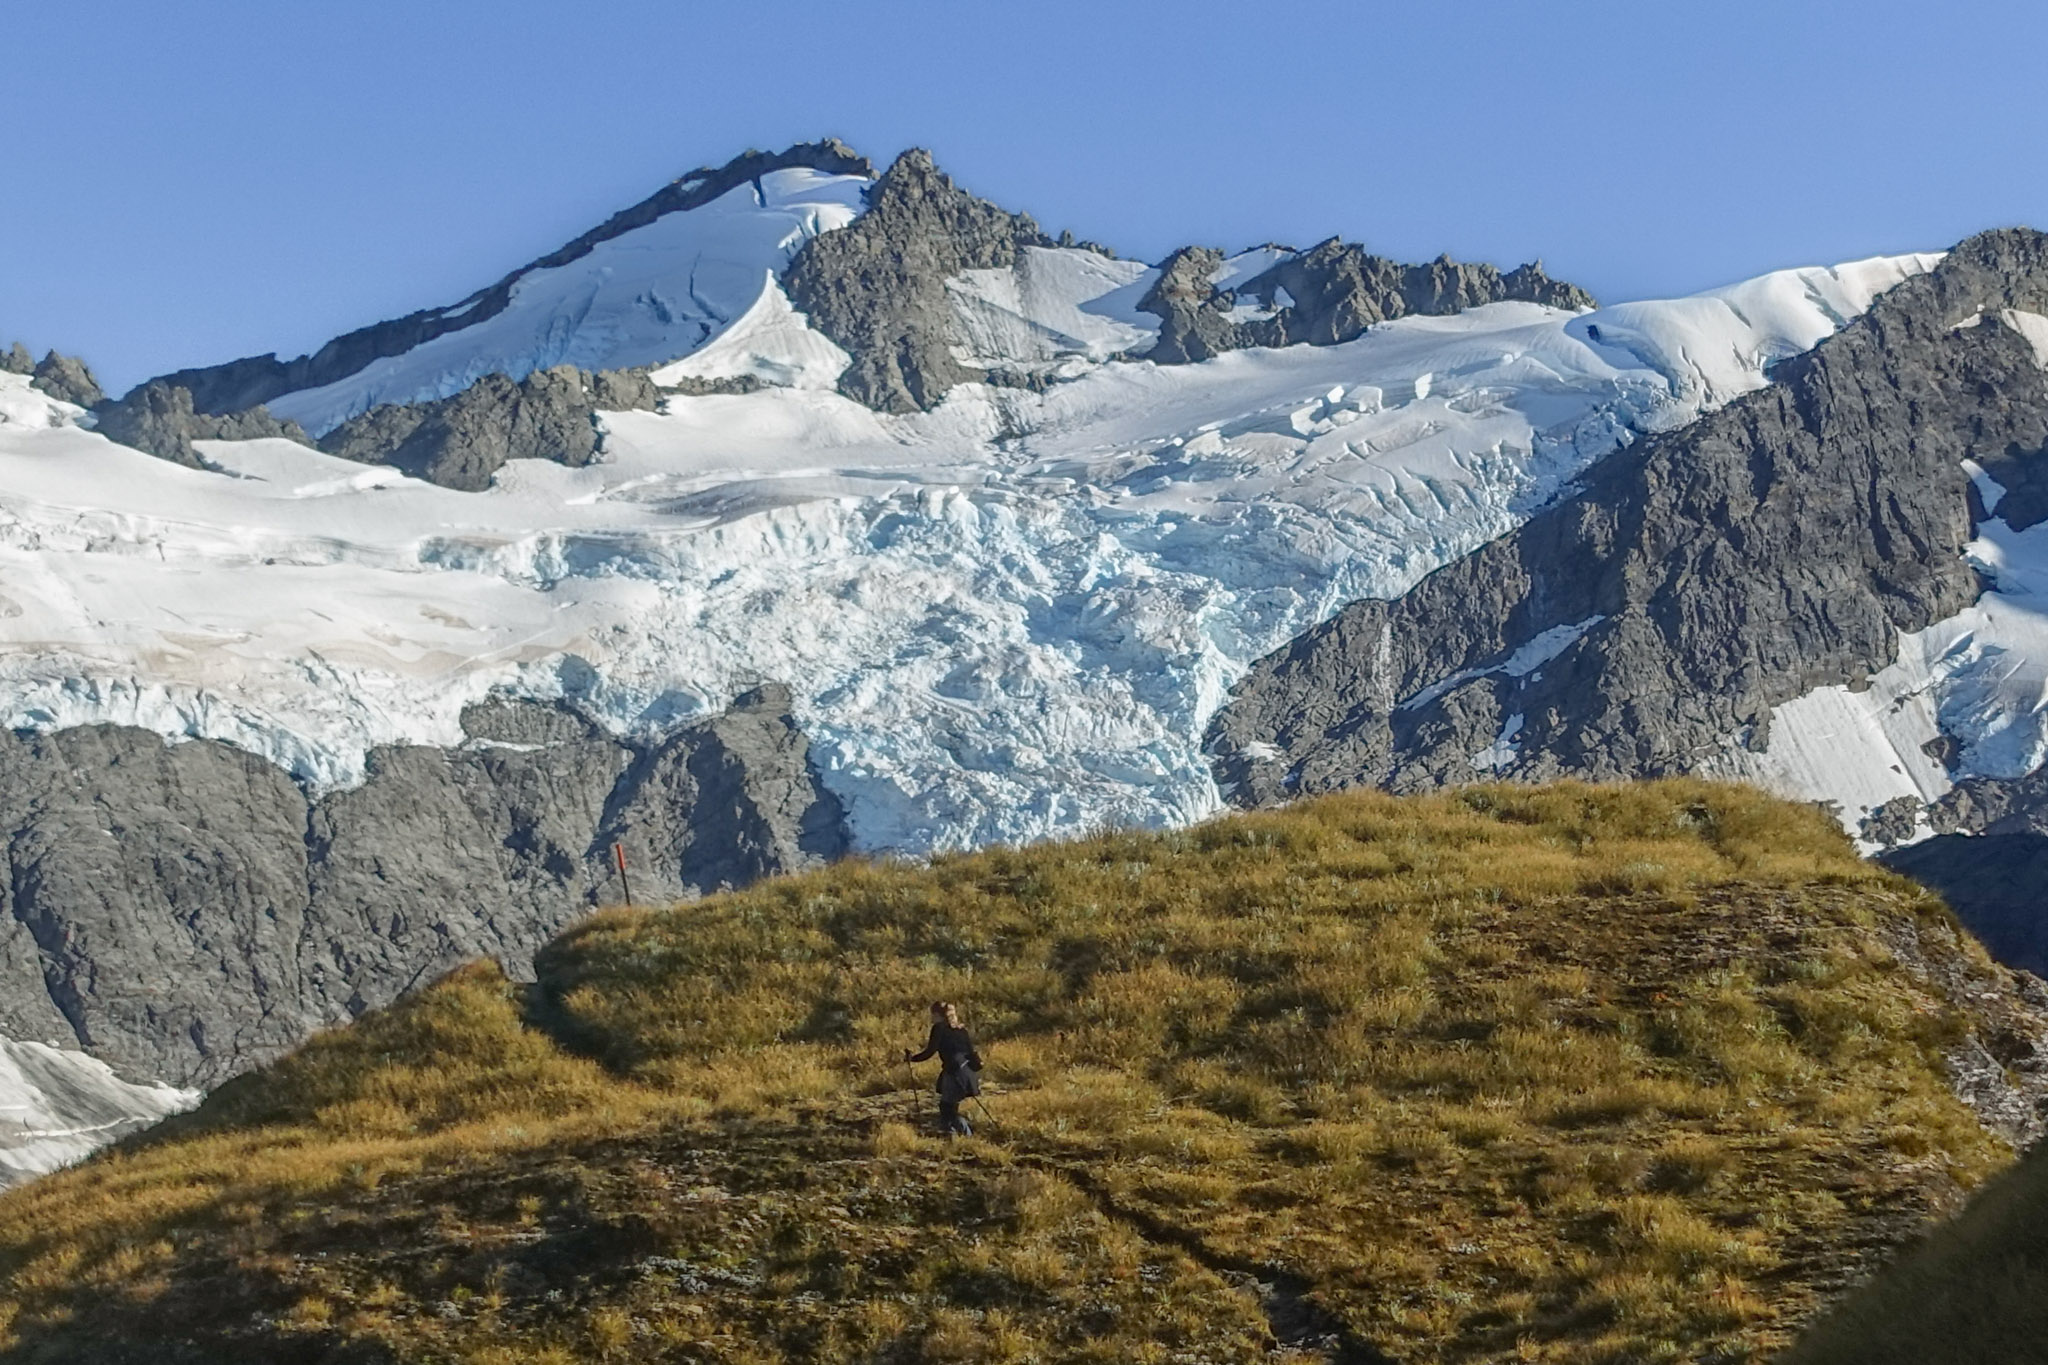
After an hour of wandering about taking photos, it was time to head back in order to beat the setting sun. We made it back it back in time to set up camp just on dark, trying and avoid the kea scoping us out (no such luck).
In preparation for the kea, I’d packed an old, cheap tent from the Warehouse with enough room to store our packs inside while we were sleeping. I’d heard several stories of kea hopping in under the tent fly and grabbing stuff that wasn’t nailed down. And one particular harrowing story of a guy waking up shivering in the middle of the night to find a kea rolling around in the down of the man’s sleeping bag it had ripped its way into (after pecking its way INTO the tent). There was no way I was donating my actual tent to the kea.
Surviving the kea at Cascade Saddle
As we cooked up our dehy meals, the kea approached. They were obviously an experienced unit, silently sneaking down the hillside to flank us, with a variety of what I can only assume were SAS-trained wing signals. Dad and I threw many mean names and some small rocks in their general direction (not trying to hit them, just scare them off), which worked for a while. But in the dim light it was hard to spot them, and every tussock shaking in the breeze was a kea ambush to my exhausted brain.
Kea aren’t stupid, and they returned once night had properly fallen and we were in the tent. We slapped the sides of the tent trying to scare them away, but they’d obviously had time to concoct an effective combat strategy from their earlier sitrep. I woke several times to a beak pecking the outside of the tent next to my head (there was a noisy piece of fabric on that corner inside the tent that I think the kea enjoyed playing with).
We hadn’t set any alarms, but the kea gave us our 5.30am courtesy call, screeching right next to the tent before flying off with what sounded suspiciously like cackling. The only physical signs of them were several small scratch marks on the tent fabric. So my normal tent probably would have been fine. And kea remain my favourite bird; I still maintain New Zealanders should be called Keas and not Kiwis.
Descending the Cascade Saddle Route
We zipped open the tent to a glistening frost and the promise of another beaut day. The lure of seeing the Dart Glacier and Cascade Saddle in the early morning light was strong. So we threw most of our gear into the storage unit / long-drop, and trekked 30 minutes back over the alpine valleys and gorges to the saddle.

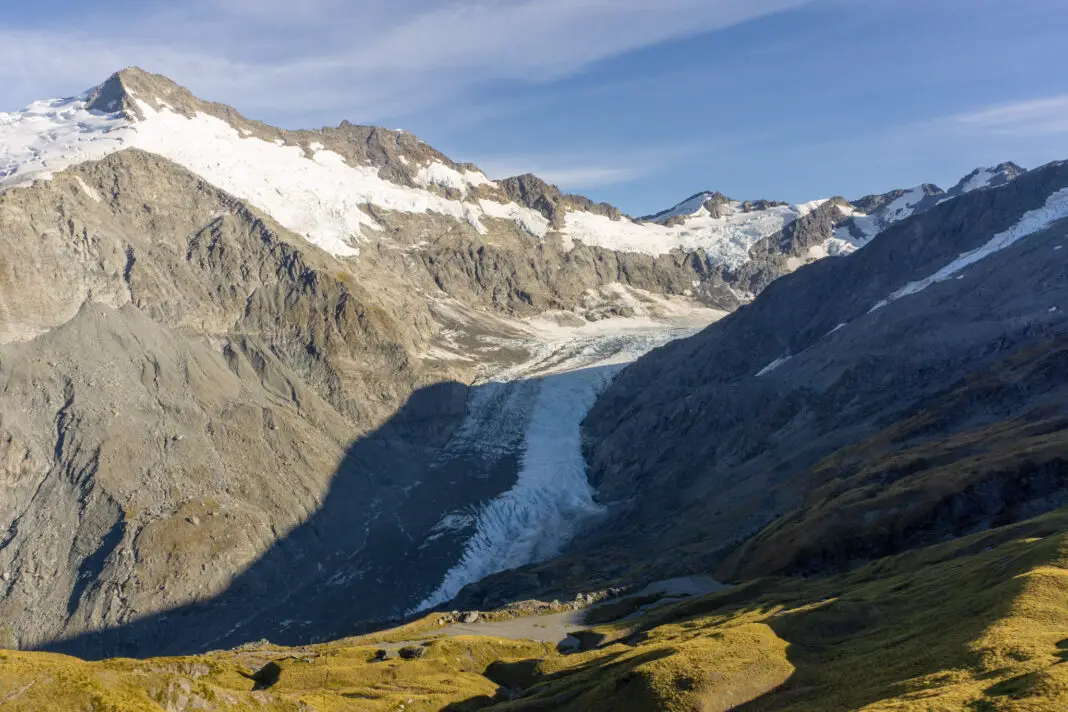
It was breath-taking. Dad and I kept telling each other how lucky we were to be able to experience it.
I could have quite easily continued on down the Dart River towards the Rees-Dart Track (the more straight-forward, but much longer, way to access Cascade Saddle), but I needed to be back at work on Monday. After taking some photos on ledges that mum would definitely not have approved of (but which were quite safe really mum), we headed back to the campsite, checking out the tarns on the way.


The climb up to the pylon from the campsite (300m elevation gain) wasn’t the most fun as my legs yelled at me they’d had enough, but at least it was over in 30 minutes. We made it to the Pylon (it’s crucial to make sure you’re climbing down in the correct location) and said goodbye to our last views of the Dart Glacier. Then it was time for the descent.
The descent
Climbing down the Cascade Saddle Route was trickier than climbing up, but there were only a few parts that freaked me out (and even then only a little bit). And the descent passed much more quickly (with less laboured breathing) than the climb up had. Mountain goat Dad was ahead of me the whole way down (let’s be honest he had been the whole trip).
Once we reached the bush-line lookout, I cooked us up a yummy dehy meal for lunch. Mmmm, the calories. Then it was a hop, skip and jump (aka several more hours trudging down the hillside) to reach Mt Aspiring Hut.
At the hut I bumped into the whanau of another Instagram friend – Thom Chin. It was awesome seeing so many people out and about! We filled up our water bottles and then set off again. After a full day of being on the move, I was very happy to finally see the truck. It marked the end of walking and the start of driving towards salty, hot chips. Mmmm more calories.
Cascade Saddle was a once-in-a-lifetime experience for me. I’d been wanting to attempt it for many years, but felt I didn’t have the fitness or experience until recently. The weather was picture perfect. The kea didn’t massacre our tent or sleeping bags. I didn’t fall off a bluff and die. We had amazing views of all the peaks and Dart Glacier. And I got to share it all with my Dad, who (at 65) was worried he’d never be able to do such big days again. (I told him he should aim to summit Tititea / Mt Aspiring next season, after all he’s more than a decade younger than the almost 80 year old who summited in 2008).

So the only question that remains is … where next?
Times taken for Cascade Saddle:
For people with a very high level of fitness, Cascade Saddle (or at least up to the Pylon) is doable as a day-trip. But most people (i.e. those who don’t regularly compete in GodZone or Ironman) will want to plan to spend at least a night at Aspiring Hut, if not camp at Cascade Stream, and split the trip into two days.
Ascent
Approximate times based on my personal fitness carrying an overnight pack. These don’t include (the many) breaks:
- Raspberry Creek carpark to Aspiring Hut: 2 hours
- Aspiring Hut to stream: 1.5 hours
- Stream to bush-line: 0.5 hours
- Bush-line to viewpoint: 1 hour
- Viewpoint to Pylon: 1 hour
- Pylon to campsite: 0.5 hours
- Campsite to Cascade Saddle view: 0.5 hours
Total time without breaks: 7 hours
(But the total time we actually took from start to finish: 11 hours)
Descent
- Campsite to Pylon: 0.5 hours
- Pylon to viewpoint: 0.75 hours
- Viewpoint to bush-line: 0.75 hours
- Bush-line to Aspiring Hut: 1.5 hours
- Aspiring Hut to carpark: 2.25 hours
Total time without breaks: 5.75 hours
(And the total time we actually took: 9 hours)
Cascade Saddle Route Safety
As always, please stay safe when you’re out exploring. Follow the Land Safety Code:
- Choose the right trip for you (do your research: read my article on tramping safety, talk to DOC)
- Understand the weather (this is an extremely hazardous tramp in adverse conditions)
- Pack warm clothes and extra food (including windproof and warm layers, regardless of how nice the day is when you set out. You check out my post on what to taking tramping here)
- Share your plans and take ways to get help (have an emergency beacon on your person)
- Take care of yourself and each other
I cannot stress enough that the Cascade Saddle Route is not a beginner tramping trip, or for people who have a fear of heights. Do you research to make sure you have the skills to attempt this climb. Be prepared to turn around if you encounter snow or ice in the upper chutes and do not have the gear (or skills) to self-arrest.
If you’re unsure about your abilities or this trip, then you can always get in touch with me here on the blog or on Instagram. I’d love to chat and answer any questions you might have on the Cascade Saddle Route. Or you can take a look at my Tramping 101 series which includes this post about how to stay safe in the outdoors.
Stay safe and get outside!
Where to next?
LET ME KNOW WHAT YOU THINK! LEAVE ME A COMMENT OR MESSAGE ME OVER ON MY INSTAGRAM.
I love hearing from readers and helping them plan their own adventures!
Great write-up Alice! Looks like there’s abundant photography opportunities… can’t wait to get me and my camera up there one of these days.
Thanks Daniel! You’d absolutely LOVE it up there! Fingers crossed you can get up there next season
Great post Alice!
We’re just back from this route, ‘though we turned back just short of the pylon due muddy/slippery conditions…
Stay safe out there! 🙂
Thanks for reading Adrian! Glad you turned around when you felt unsafe, that bit just before the pylon can be really dodgy in bad conditions! Hope you got some great views anyway 🙂
Does the Cascade steam campsite need booking in advance?
No, other than the toilet and the stream (and the kea) there are no other facilities so it’s not bookable. There are quite a few sites.
Beautiful pictures and writing, I dream of doing this trip one day. Thanks for sharing your experience
I hope you get to do it one day Jocelyn!
Thanks for this post. Planning to do this in a few days. In dry conditions did you ever feel like you could slip and fall over the bluffs ? How do people manage to slide over the bluffs ?
I mean there’s always that risk, just like there is the risk of tripping and falling on flat ground around home. But in general, no, on the day I completed this hike (bluebird conditions), I didn’t feel unsafe.
To my knowledge, most fatalities have been a result of slipping in poor conditions (rain, snow or ice), or tripping while distracted (e.g. taking a selfie).
If you get a good day at the moment it would be a great time to go – minimal snow on the tops, still long daylight hours comparatively. I hope you get a good forecast and can make it work!
And if you reach a point where you’re uncomfortable, you can just turn back around. The views anywhere above the bushline are incredible so it will still be worth your while even if you don’t make it to the top.
Let me know how you get on!
I’d also highly recommend watching the saved highlights on my Instagram profile if you haven’t already seen them – @alice.adventuring. I feel like video showcases it much better than photos can!